Microcontrollers(639)
- 8bit 8051 MCUs(88)
- 8bit KM101 MCUs(27)
-
Arm Cortex-M0 MCUs(293)
-
M029G/M030G/M031G Series(9)

-
M031 Series(21)

-
M031BT Series(2)
-
M032 Series(16)
-
M032BT Series(2)
-
M071 Series(4)
-
M091 Series(4)
-
M0A21 Series(4)
-
M0A23 Series(4)
- NUC029 Series(12)
- Nano103 Base Series(3)
- Nano100/102 Base Series(19)
- Nano110/112 LCD Series(19)
- Nano120 USB Series(10)
- Nano130 Advanced Series(8)
- NUC100/200 Advanced Series(15)
-
NUC120/122/123/220 USB Series(38)
- NUC120LC1DN
- NUC120LD2DN
- NUC120LE3DN
- NUC120RD2DN
- NUC120RC1DN
- NUC120RE3DN
- NUC120VE3DN
- NUC122LC1AN
- NUC122LC1DN
- NUC122LD2AN
- NUC122LD2DN
- NUC122SC1AN
- NUC122SC1DN
- NUC122SD2AN
- NUC122SD2DN
- NUC122ZC1AN
- NUC122ZC1DN
- NUC122ZD2AN
- NUC122ZD2DN
- NUC123LC2AE1
- NUC123LD4AE0
- NUC123LD4AN0
- NUC123SC2AE1
- NUC123LC2AN1
- NUC123SC2AN1
- NUC123SD4AE0
- NUC123SD4AN0
- NUC123ZC2AE1
- NUC123ZC2AN1
- NUC123ZD4AN0
- NUC123ZD4AE0
- NUC220LC2AN
- NUC220LD2AN
- NUC220LE3AN
- NUC220SC2AN
- NUC220SD2AN
- NUC220SE3AN
- NUC220VE3AN
- NUC121/125 Series(6)
- NUC126 USB Series(6)
- NUC130/230 CAN Series(14)
- NUC140/240 Connectivity Series(14)
- M051 Base Series(21)
- Mini51 Base Series(21)
- M0518 Series(4)
- NUC131/NUC1311 CAN Series(7)
- M0519 Series(5)
- M0564 Series(5)
-
M029G/M030G/M031G Series(9)
- Arm Cortex-M23 MCUs(77)
-
Arm Cortex-M4 MCUs(145)
-
M433 CAN/USB FS OTG Series(2)
- KM1M4BF Series(1)
-
M463 CAN FD/USB HS Series(7)
-
M467 Ethernet/Crypto Series(8)
-
M471 Series(6)
- M487 Ethernet Series(4)
- M485 Crypto Series(5)
- M484 USB HS OTG Series(5)
- M483 CAN Series(8)
- M482 USB FS OTG Series(14)
- M481 Base Series(11)
- M4TK Touch Key Series(6)
- M451 Base Series(10)
- M4521 USB Series(2)
- NUC442/472 Series(16)
- M452 USB Series(9)
- M453 CAN Series(10)
- NUC505 Series(7)
- M451M Series(6)
-
M433 CAN/USB FS OTG Series(2)
- Arm Cortex-M7 MCUs(3)
- 32bit KM103 MCUs(6)
MOSFET(73)
-
Low On Resistance MOSFET for Li-ion Battery Protection(47)
-
12V-30V Nch Dual MOSFET(47)
- KFCAB21B10L
- KFCAB21C00L
- KFCAB21860L
- KFCAB21520L
- KFCAB21B50L
- KFCAB21890L
- KFCAB21770L
- KFCAB21260L
- KFCAB21B30L
- KFCAB21740L
- KFCAB21490L
- KFCAB21A50L
- KFCAB21350L
- KFCAB21830L
- KFCAB12004NL
- KFC6B21150L
- KFC6B21B70L
- FC6B21100L
- KFC4B21A30L
- KFC4B21210L
- KFC4B21280L
- KFC4B21220L
- KFC4B21080L
- KFC4B21320L
- KFC4A21300L
- KFC4B21300L
- KFC4B21330L
- KFCAB22370L
- KFC6B22160L
- KFCAB22510L
- KFC6B22500L
- KFC4B22180L
- KFC4B22270L
- KFC4B22690L
- KFC4B22670L
- KFC4B22830L
- KFCAB22014NL
- KFCAB22020NL
- KFCAB22630L
- KFCAB22620L
- KFCAB22680L
- KFCAB22900L
- KFC6B22100L
- KFC6B22220L
- KFC4B22070L
- KFC7P23440L
- KFCAB30029NL
-
12V-30V Nch Dual MOSFET(47)
- Low On Resistance MOSFET for Li-ion Battery Charging Control(5)
- Small Size MOSFET for Automotive Switching(11)
- Small Size MOSFET for General Switching(10)
Smart Home Audio(325)
- Audio SoCs(20)
- ISD ChipCorder(28)
- Audio Converters(37)
- Audio Amplifiers(20)
- Audio Enhancement(3)
-
Audio & Speech Controllers(217)
- NuVoice Series(4)
-
PowerSpeech Series(128)
- N584L020
- N584L030
- N584L031
- N584L040
- N584L041
- N584L061
- N584L080
- N584L081
- N584L120
- N584L121
- N588H061
- N588H061
- N588H120
- N588H170
- N588H250
- N588H340
- N588HP340(OTP)
- W584A011
- W584A016
- W584A017
- W584A021
- W584A022
- W584A025
- W584A031
- W584A032
- W584A035
- W584A041
- W584A042
- W584A045
- W584A051
- W584A052
- W584A061
- W584A062
- W584A065
- W584A071
- W584A075
- W584A081
- W584A085
- W584A100
- W584A120
- W584A151
- W584A171
- W584A191
- W584A300
- W584A340
- W584AP017(OTP)
- W584AP065(OTP)
- W584B010
- W584B015
- W584B016
- W584B020
- W584B021
- W584B030
- W584B031
- W584B040
- W584B041
- W584B052
- W584B062
- W584B070
- W584B080
- W584B100
- W584B120
- W584B150
- W584B170
- W584B190
- W588C003
- W588C006
- W588C009
- W588C012
- W588C015
- W588C020
- W588C025
- W588C030
- W588C036
- W588C041
- W588C046
- W588C051
- W588C056
- W588C061
- W588C071
- W588C081
- W588C101
- W588C121
- W588C150
- W588C170
- W588C210
- W588C260
- W588C300
- W588C350
- W588C400
- W588D003
- W588D006
- W588D009
- W588D012
- W588D015
- W588D020
- W588D025
- W588D030
- W588D035
- W588D040
- W588D045
- W588D050
- W588D055
- W588D060
- W588D070
- W588D080
- W588D100
- W588D120
- W588D150
- W588D170
- W588D210
- W588D260
- W588D300
- W588D350
- W588D400
- W588DF060(MTP)
- W588L020
- W588L030
- W588L035
- W588L040
- W588L050
- W588L060
- W588L070
- W588L080
- W588L100
- W588L121
- W588L150
- W588L170
-
BandDirector Series(48)
- N567G030
- N567G041
- N567G080
- N567G120
- N567G160
- N567G200
- N567G240
- N567G280
- N567G330
- N567H030
- N567H041
- N567H080
- N567H120
- N567H160
- N567H200
- N567H240
- N567H280
- N567H330
- N567HP330(OTP)
- N567K030
- N567K041
- N567K080
- N567K120
- N567K160
- N567K200
- N567K240
- N567K280
- N567K330
- N567L120
- N567L160
- N567L200
- W567C070
- W567C080
- W567C100
- W567C120
- W567C126
- W567C151
- W567C171
- W567C210
- W567C260
- W567C266
- W567C300
- W567C306
- W567C340
- W567C346
- W567C380
- W567C386
- W567CP260(OTP)
- ViewTalk Series(20)
- Peripheral Series(17)
- NuSpeech Series
- NSPxx Series
IoT Solution(20)
-
IoT Platform(18)
- NuMaker-IoT-MA35D0-A1
-
NuMaker-IoT-MA35D1-A1
- NuMaker-IoT-M2354
- NuMaker-RTU-NUC980(Chili)
- NuMaker-Server-NUC980
- NuMaker-IIoT-NUC980
- NuMaker-IIoT-NUC980G2
-
NuMaker-IIoT-NUC980G2D
- NuMaker-Tomato
- NuMaker-IoT-M487
- NuMaker-PFM-M487
- NuMaker-PFM-M453
- NuMaker-PFM-NUC472
- NuMaker-PFM-M2351
- NuMaker-IoT-M263A
- NuMaker-PFM-NANO130
- NuMaker-Brick
- NuMaker-Uni
- Alexa Connect Kit Platform
- IoT Engine Platform(1)
- Arduino Compatible Platform(1)
- LoRa Platform
NUC980 Industrial control IoT series
-
 Watch time - 4:15Take Nuvoton NuMaker-IIoT-NUC980 running Linux as the platform and learn how to develop various functions. Watch this video, you will learn how to use cellular, such as LTE or NB-IoT, to connect to network on NuMaker-IIoT-NUC980 board. - For more information, please visit Nuvoton Technology Website: https://bit.ly/3hVdcmC Buy now: https://direct.nuvoton.com/tw/numaker-nuc980-iiot Contact us: SalesSupport@nuvoton.com
 -
 Watch time - 2:44Take Nuvoton NuMaker-IIoT-NUC980 running Linux as the platform and learn how to develop various functions. Watch this video, you will learn how to connect to network via Ethernet on NuMaker-IIoT-NUC980 board. - For more information, please visit Nuvoton Technology Website: https://bit.ly/3hVdcmC Buy now: https://direct.nuvoton.com/tw/numaker-nuc980-iiot Contact us: SalesSupport@nuvoton.com
 -
 Training Tool Learning Watch time - 8:28Develop with Nuvoton NuMaker-IoT-M487 and Mbed OS to learn various functions. You will learn from this video to use the NuMaker-IoT-M487 development board and Mbed OS to connect to Microsoft Azure IoT Hub service. #Tool #Training #Learning #Intermediate #en - For more information, please visit Nuvoton Technology Website: https://bit.ly/3hVdcmC Buy now: https://bit.ly/3bk0AD8 Contact us: SalesSupport@nuvoton.com
 -
 Training Tool Learning Watch time - 1:8Hello I’m AE Sam at Nuvoton, today we are going to introduce HW design guide of crystal. Crystal is an ultra-low-power oscillator, easily affected by noise, there are five major tips for improving oscillator stability. First, the crystal should be mounted as close as possible to the microcontroller. Second, short oscillator paths & less test point. Third, symmetry between crystal capacitances. Fourth, A guard ring ground around the oscillator path Finally, any high-frequency path should be routed away from the crystal paths and components. That's all for the brief introduction about hardware design guide of crystal, if you need more information, you can contact us, thank you, bye ~ #Tool #Training #Learning #Intermediate #en - For more information, please visit Nuvoton Technology Website: https://bit.ly/3hVdcmC Buy now: https://direct.nuvoton.com/numaker-m251sd Contact us: SalesSupport@nuvoton.com
 -
 Watch time - 3:13Take Nuvoton NuMaker-IIoT-NUC980 running Linux as the platform and learn how to develop various functions. Watch this video, you will learn how to control GPIO to blink the LED on NuMaker-IIoT-NUC980 board. - For more information, please visit Nuvoton Technology Website: https://bit.ly/3hVdcmC Buy now: https://direct.nuvoton.com/tw/numaker-nuc980-iiot Contact us: SalesSupport@nuvoton.com
 -
 Product Learning Watch time - 5:0Introduce the waterproof and noise immunity of ML56 touch key. Hello! Everyone! I am Nuvoton FAE Tim. Today, I will show you the waterproof and noise immunity of ML56 touch key. First introduce the waterproof and noise immunity of ML56 touch key. Good waterproof function, support finger touch with 2 mm depth water droplet. IEC 61000-4-6 conducted noise immunity (CNI) with 10 Vrms noise voltage. Next, we will explain the related parameter settings of the ML56 touch key, and first explain the touch sensitivity. #Pulse Width (Touch key sensing pulse width time control) Touch key sensitivity can be adjusted by setting Pulse Width properly, shorter Pulse Width setting comes with poor sensitivity and less power-consumption, vice versa. Then explain the stability of touch performance, Part 1. #Times (Touch key sensing times control) Touch key raw data stability can be adjusted by setting Times properly, shorter Times setting comes with poor raw data stability and less power-consumption, vice versa. Stability of touch performance, Part 2. #IIR (IIR filter) IIR filter can control the ratio of current raw data and previous one. User can enable IIR Filter to be against noise. It will increase the touch response time when enables IIR Filter. Stability of touch performance, Part 3. #Debounce (Touch key debounce) Touch key stability can be adjusted by setting Debounce properly, the debounce times for touch key entry (on) and release (off) detection, shorter Debounce setting comes with faster touch response time, vice versa. Stability of touch performance, Part 4. #Trace Baseline (Baseline is generated by “Calibration”) Touch key auto environment compensation is an algorithm that baseline tracking each touch key automatically at power-up and keeps compensating environment variation affects touch key performance during runtime. Based on the above parameter description, the following introduces the waterproof and noise immunity parameter settings. The first is waterproof parameter setting. Good waterproof function, support finger touch with 2 mm depth water droplet. Touch key system parameters are shown in the table Pulse Width = 500 ns Times = 128 Next is the noise immunity parameter setting IEC 61000-4-6 conducted noise immunity (CNI) with 10 Vrms noise voltage. Touch key system parameters are shown in the table. Pulse Width = 2 us Times = 128 IIR New = 6, Old = 2 Debounce Entry = 1, Release = 1 Then we use the ML56 NuMaker Board to show you the waterproof function of the touch key. Dip the finger in water first, and then touch the touch key. Repeat the above actions, we can see that the touch key still works normally and is not affected. Finally, we use the ML56 NuMaker Board to show you the noise immunity ability of the touch key. Turn on the walkie-talkie first, and then interfere with the touch key at close range, we can see that the touch key still operate normally and is not affected. That's all for today's video, thank you everyone! If you have any questions, please contact us. - For more information, please visit Nuvoton Technology Website: https://bit.ly/3hVdcmC Buy now: https://direct.nuvoton.com/tw/low-power-8051-series/ Contact us: SalesSupport@nuvoton.comon.com #Product #Learning #Basic #en#Basic #ML56 #NuMicro #Pulse Width (Touch key sensing pulse width time control) #IIR (IIR filter) #Product #en #Trace Baseline (Baseline is generated by “Calibration”) #Times (Touch key sensing times control) #8051 #Learning #Debounce (Touch key debounce) #Nuvoton #touch key IC #noise immunity #low power #ML54 #waterproof #MCU #ML51
 -
 Training Learning Watch time - 4:0Take Nuvoton NuMaker-IIoT-NUC980 running Linux as the platform and learn how to develop various functions. Watch this video and you will learn how to install Buildroot for NuMaker-IIoT-NUC980 board before starting development. - For more information, please visit Nuvoton Technology Website: https://bit.ly/3hVdcmC Buy now: https://direct.nuvoton.com/tw/numaker-nuc980-iiot Contact us: SalesSupport@nuvoton.com #Training #Learning #Basic #en
 -
 Training Tool Learning Watch time - 5:53Hello everyone, I am Morgan, the principal engineer of Nuvoton Technology. Today, I will show you how to connect to AWS IoT service using MbedOS on NuMaker-IoT-M487 development board The sample code is on GitHub, the URL is https://github.com/OpenNuvoton/Mbed-to-AWS-IoT To avoid typos, use keyword “OpenNuvoton” to search on google. Find the Nuvoton on GitHub, and click it On the Nuvoton GitHub page, use AWS as keyword to search the sample code: Mbed-to-AWS-IoT Right click to copy the URL for later use. Then enter the URL https://ide.mbed.com After log in, make sure the NuMaker-IoT-M487 board has selected in the upper right corner. If not, please refer Nuvoton IoT Tutorial series “Get Started with Mbed OS”. There is detailed description of how to add a board. Click the “Import” on the left of menu bar. In the “Import Wizard”, click “Click here” Please paste or key in the sample code URL to “Source URL:”, Select Import as “Program” Click “Import Name”, the project name “Mbed-to-AWS-IoT” will be filled automatically. Then click “Import”. After sample code imported, click “mbed_app.json” to open it. To use Wi-Fi, you have to configure SSID and password to match your Wi-Fi AP setting. In NuMaker_IOT_M487 session of mbed_app.json file, find the “wifi-ssid” to set your SSID. It is at line 44. And then set password to “wifi-password”. It is at line 45. Save it and click “Compile” to build the code. It takes time to compile code, please wait. You need an AWS account to use AWS IoT Core service. To create a thing, a policy, and certificates, then put the certificate to MQTT_server_setting.h file in the sample code. The sample code has included a certificate provided by Nuvoton for test only, so that you can quickly operate this example. If you don’t have an AWS account, it is recommended that you apply for an account and use your certificates in the example to observe the connection status on AWS IoT console page. After completed, “Success” will appear in the compile output window. The browser downloads the binary firmware file directly after a successful compiling. It will be saved in a default download folder. In Chrome, you can click download file and select “Show in folder”. Then we connect the NuMaker-IoT-M487 USB port to your computer. Please find the virtual COM port assigned for NuMaker-IoT-M487 in Device Manager. In the tutorial, the “Nu-Link Virtual Com Port” is COMx. Then use your favorite terminal tool. Here we use Putty. Open the COMx port with 115200 baud rate. And no flow control settings. Then “Open” it. Back to the folder you just download the binary firmware file (Mbed-to-AWS-IoT.NUMAKER_IOT_M487.bin). Drag and drop the file to NuMicro MCU drive. You will see the copying progress dialog box. You can see the messages on terminal. The device has acquired IP address from Wi-Fi AP, then successfully connect to AWS IoT and subscribe a topic. Then press button (SW2) on board to send a message. You can see the message published to server and received a message from server. That’s all for this tutorial. Thank you for watching. Welcome to subscribe to our channel. If you want to get more information, please contact us “SalesSupport@nuvoton.com” - For more information, please visit Nuvoton Technology Website: https://bit.ly/3hVdcmC Buy now: https://direct.nuvoton.com/tw/numaker-iot-m487 Contact us: SalesSupport@nuvoton.com #tool #training #learning #intermediate #en
 -
 Product Application Webinar Watch time - 59:3Developing IoT devices can be a painful process. In this webinar, you will learn how to develop an IoT enabled device quickly and easily with Nuvoton IoT platforms. We will cover IoT device system architectures, security consideration, development kits for different cloud services, and the latest practices to bring your IoT products time to market quickly. Speaker: UE00 Senior Product Marketing Manager, Harry Chen - For more information, please visit Nuvoton Technology Website: https://bit.ly/3hVdcmC Buy now: https://bit.ly/3bk0AD8 Contact us: SalesSupport@nuvoton.com #Product #Application #Webinar #General #en
 -
 Application Learning Watch time - 4:3The purpose of video is to demonstrate functions of NuMaker-RTU-NUC980 within 5 minutes, including Ethernet webserver, Wi-Fi webserver, USB camera, and NFS function. If you get the NuMaker-RTU-NUC980 board, you can follow this video to implement all the functions #application #learning #intermediate #en - For more information, please visit: https://bit.ly/3hVdcmC Buy now: https://direct.nuvoton.com/tw/numaker-rtu-nuc980?search_query=Chili&results=1 Contact us: SalesSupport@nuvoton.com
 -
 Application Learning Watch time - 1:30Nuvoton provides a new development platform, Chili. Chili is designed by NUC980 family. A user can begin application developing within 15 minutes once receiving this PCB. This PCB is very small and can be easily installed into another system after development complete. It is suitable for some remote control or IoT applications. #application #learning #intermediate #en - For more information, please visit Nuvoton Technology Website: https://bit.ly/3hVdcmC Buy now: https://direct.nuvoton.com/tw/numaker-rtu-nuc980?search_query=Chili&results=1 Contact us: SalesSupport@nuvoton.com
 -
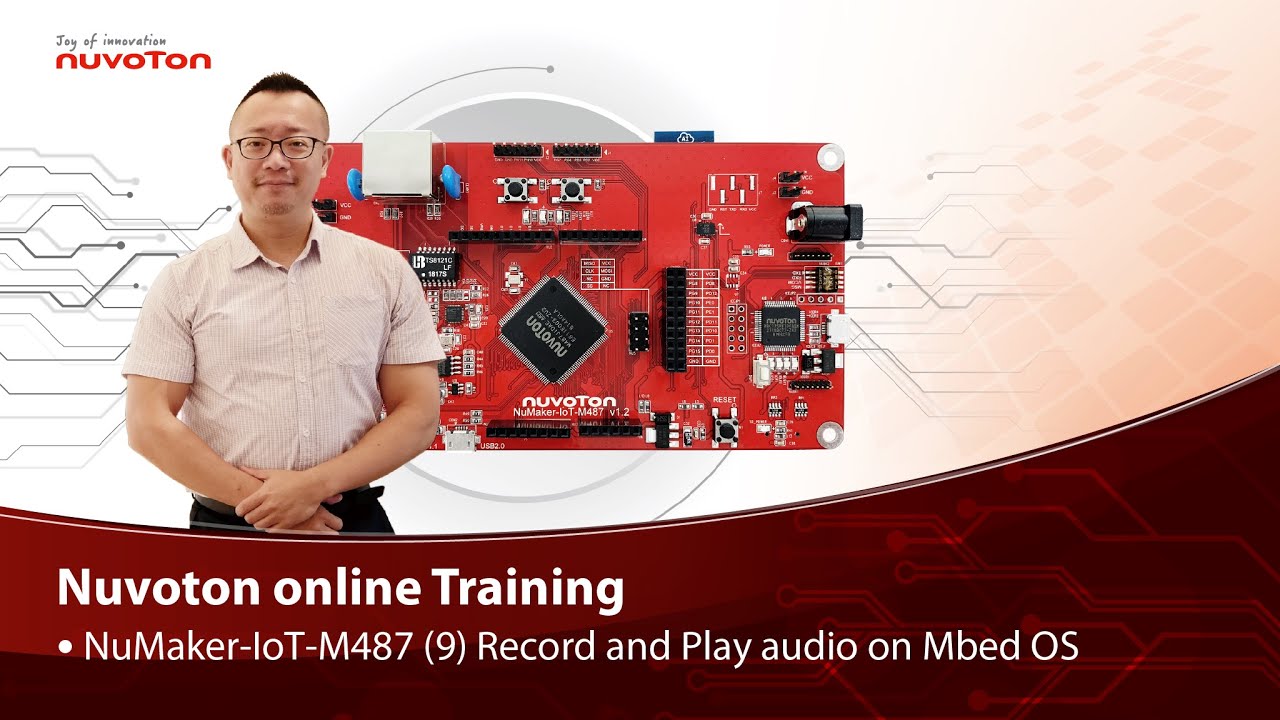 Training Tool Learning Watch time - 5:0Hello everyone, I am Morgan, the principal engineer of Nuvoton Technology. Today, I will show you how to record and play audio with Mbed OS on NuMaker-IoT-M487 development board. Open Chrome browser, and enter the URL https://ide.mbed.com to use the Mbed Online Compiler. After log in, make sure that NuMaker-IoT-M487 board already selected in the upper right corner. If not, please refer Nuvoton IoT Tutorial series “Get Started with Mbed OS” which has a detailed description of how to add a board. Click the “New” on the left of menu bar, a “Create new program” window will be displayed. You can see that the Platform has been set to NuMaker-IoT-M487. In the Template, select the "NuMaker audio playback" for this tutorial. Then click OK. Now you can see that the sample code has loaded on the page. The sample code has three functions: 1. Record 10 seconds sound and save to Micro SD card 2. Play sounds stored in Micro SD card 3. Loopback. Record sound and play it immediately. Click main.cpp to open it. Then scroll down to line 421. You can see the functions calls here. It set to loopback only. Let’s do a little modification. Hit a key on console to start record 10 seconds then play it, and then do loopback. printf("Press a key to start recording 10 seconds..."); getchar(); demo_record(); demo_play(); demo_loopback(); Save it and click “Compile” to build the code. Compilation takes a while, please wait. After the compilation is completed, “Success” will appear in the compile output window. The browser downloads the binary firmware file directly after a successful compiling. It will be saved in a default download folder. In Chrome, you can click download file and select “Show in folder”. Please plug an earphone commonly used for mobile phone in headphone jack on NuMaker-IoT-M487 board. For demonstration, we use a headphone splitter cable to connect a microphone and a speaker. Do not put the microphone and speaker too close to avoid feedback howling. Then connect the USB port to your computer and make sure the onboard LED lights up. Back to the folder you just download the binary firmware file (NuMaker-mbed-AudioPlayback-example.NUMAKER_IOT_M487.bin). Drag and drop the file to NuMicro MCU drive. You will see the copying progress dialog box. Please find the virtual COM port assigned for NuMaker-IoT-M487 in Device Manager. In the demonstration, the “Nu-Link Virtual Com Port” is COMx. Then use your favorite terminal tool. Here we use Putty. Open the COMx port with 9600 baud rate. And no flow control settings. Then “Open” it. Press “Reset” on board to run the firmware again. Press a key on terminal to start record. Speak for about 10 seconds, then your voice will be played. That’s all for this tutorial. Thank you for watching. Welcome to subscribe to our channel. If you want to get more information, please contact us “SalesSupport@nuvoton.com” - For more information, please visit Nuvoton Technology Website: https://bit.ly/3hVdcmC Buy now: https://direct.nuvoton.com/tw/numaker-iot-m487 Contact us: SalesSupport@nuvoton.com #tool #training #learning #intermediate #en