Microcontrollers(639)
- 8bit 8051 MCUs(88)
- 8bit KM101 MCUs(27)
-
Arm Cortex-M0 MCUs(293)
-
M029G/M030G/M031G Series(9)

-
M031 Series(21)

-
M031BT Series(2)
-
M032 Series(16)
-
M032BT Series(2)
-
M071 Series(4)
-
M091 Series(4)
-
M0A21 Series(4)
-
M0A23 Series(4)
- NUC029 Series(12)
- Nano103 Base Series(3)
- Nano100/102 Base Series(19)
- Nano110/112 LCD Series(19)
- Nano120 USB Series(10)
- Nano130 Advanced Series(8)
- NUC100/200 Advanced Series(15)
-
NUC120/122/123/220 USB Series(38)
- NUC120LC1DN
- NUC120LD2DN
- NUC120LE3DN
- NUC120RD2DN
- NUC120RC1DN
- NUC120RE3DN
- NUC120VE3DN
- NUC122LC1AN
- NUC122LC1DN
- NUC122LD2AN
- NUC122LD2DN
- NUC122SC1AN
- NUC122SC1DN
- NUC122SD2AN
- NUC122SD2DN
- NUC122ZC1AN
- NUC122ZC1DN
- NUC122ZD2AN
- NUC122ZD2DN
- NUC123LC2AE1
- NUC123LD4AE0
- NUC123LD4AN0
- NUC123SC2AE1
- NUC123LC2AN1
- NUC123SC2AN1
- NUC123SD4AE0
- NUC123SD4AN0
- NUC123ZC2AE1
- NUC123ZC2AN1
- NUC123ZD4AN0
- NUC123ZD4AE0
- NUC220LC2AN
- NUC220LD2AN
- NUC220LE3AN
- NUC220SC2AN
- NUC220SD2AN
- NUC220SE3AN
- NUC220VE3AN
- NUC121/125 Series(6)
- NUC126 USB Series(6)
- NUC130/230 CAN Series(14)
- NUC140/240 Connectivity Series(14)
- M051 Base Series(21)
- Mini51 Base Series(21)
- M0518 Series(4)
- NUC131/NUC1311 CAN Series(7)
- M0519 Series(5)
- M0564 Series(5)
-
M029G/M030G/M031G Series(9)
- Arm Cortex-M23 MCUs(77)
-
Arm Cortex-M4 MCUs(145)
-
M433 CAN/USB FS OTG Series(2)
- KM1M4BF Series(1)
-
M463 CAN FD/USB HS Series(7)
-
M467 Ethernet/Crypto Series(8)
-
M471 Series(6)
- M487 Ethernet Series(4)
- M485 Crypto Series(5)
- M484 USB HS OTG Series(5)
- M483 CAN Series(8)
- M482 USB FS OTG Series(14)
- M481 Base Series(11)
- M4TK Touch Key Series(6)
- M451 Base Series(10)
- M4521 USB Series(2)
- NUC442/472 Series(16)
- M452 USB Series(9)
- M453 CAN Series(10)
- NUC505 Series(7)
- M451M Series(6)
-
M433 CAN/USB FS OTG Series(2)
- Arm Cortex-M7 MCUs(3)
- 32bit KM103 MCUs(6)
MOSFET(73)
-
Low On Resistance MOSFET for Li-ion Battery Protection(47)
-
12V-30V Nch Dual MOSFET(47)
- KFCAB21B10L
- KFCAB21C00L
- KFCAB21860L
- KFCAB21520L
- KFCAB21B50L
- KFCAB21890L
- KFCAB21770L
- KFCAB21260L
- KFCAB21B30L
- KFCAB21740L
- KFCAB21490L
- KFCAB21A50L
- KFCAB21350L
- KFCAB21830L
- KFCAB12004NL
- KFC6B21150L
- KFC6B21B70L
- FC6B21100L
- KFC4B21A30L
- KFC4B21210L
- KFC4B21280L
- KFC4B21220L
- KFC4B21080L
- KFC4B21320L
- KFC4A21300L
- KFC4B21300L
- KFC4B21330L
- KFCAB22370L
- KFC6B22160L
- KFCAB22510L
- KFC6B22500L
- KFC4B22180L
- KFC4B22270L
- KFC4B22690L
- KFC4B22670L
- KFC4B22830L
- KFCAB22014NL
- KFCAB22020NL
- KFCAB22630L
- KFCAB22620L
- KFCAB22680L
- KFCAB22900L
- KFC6B22100L
- KFC6B22220L
- KFC4B22070L
- KFC7P23440L
- KFCAB30029NL
-
12V-30V Nch Dual MOSFET(47)
- Low On Resistance MOSFET for Li-ion Battery Charging Control(5)
- Small Size MOSFET for Automotive Switching(11)
- Small Size MOSFET for General Switching(10)
Smart Home Audio(325)
- Audio SoCs(20)
- ISD ChipCorder(28)
- Audio Converters(37)
- Audio Amplifiers(20)
- Audio Enhancement(3)
-
Audio & Speech Controllers(217)
- NuVoice Series(4)
-
PowerSpeech Series(128)
- N584L020
- N584L030
- N584L031
- N584L040
- N584L041
- N584L061
- N584L080
- N584L081
- N584L120
- N584L121
- N588H061
- N588H061
- N588H120
- N588H170
- N588H250
- N588H340
- N588HP340(OTP)
- W584A011
- W584A016
- W584A017
- W584A021
- W584A022
- W584A025
- W584A031
- W584A032
- W584A035
- W584A041
- W584A042
- W584A045
- W584A051
- W584A052
- W584A061
- W584A062
- W584A065
- W584A071
- W584A075
- W584A081
- W584A085
- W584A100
- W584A120
- W584A151
- W584A171
- W584A191
- W584A300
- W584A340
- W584AP017(OTP)
- W584AP065(OTP)
- W584B010
- W584B015
- W584B016
- W584B020
- W584B021
- W584B030
- W584B031
- W584B040
- W584B041
- W584B052
- W584B062
- W584B070
- W584B080
- W584B100
- W584B120
- W584B150
- W584B170
- W584B190
- W588C003
- W588C006
- W588C009
- W588C012
- W588C015
- W588C020
- W588C025
- W588C030
- W588C036
- W588C041
- W588C046
- W588C051
- W588C056
- W588C061
- W588C071
- W588C081
- W588C101
- W588C121
- W588C150
- W588C170
- W588C210
- W588C260
- W588C300
- W588C350
- W588C400
- W588D003
- W588D006
- W588D009
- W588D012
- W588D015
- W588D020
- W588D025
- W588D030
- W588D035
- W588D040
- W588D045
- W588D050
- W588D055
- W588D060
- W588D070
- W588D080
- W588D100
- W588D120
- W588D150
- W588D170
- W588D210
- W588D260
- W588D300
- W588D350
- W588D400
- W588DF060(MTP)
- W588L020
- W588L030
- W588L035
- W588L040
- W588L050
- W588L060
- W588L070
- W588L080
- W588L100
- W588L121
- W588L150
- W588L170
-
BandDirector Series(48)
- N567G030
- N567G041
- N567G080
- N567G120
- N567G160
- N567G200
- N567G240
- N567G280
- N567G330
- N567H030
- N567H041
- N567H080
- N567H120
- N567H160
- N567H200
- N567H240
- N567H280
- N567H330
- N567HP330(OTP)
- N567K030
- N567K041
- N567K080
- N567K120
- N567K160
- N567K200
- N567K240
- N567K280
- N567K330
- N567L120
- N567L160
- N567L200
- W567C070
- W567C080
- W567C100
- W567C120
- W567C126
- W567C151
- W567C171
- W567C210
- W567C260
- W567C266
- W567C300
- W567C306
- W567C340
- W567C346
- W567C380
- W567C386
- W567CP260(OTP)
- ViewTalk Series(20)
- Peripheral Series(17)
- NuSpeech Series
- NSPxx Series
IoT Solution(20)
-
IoT Platform(18)
- NuMaker-IoT-MA35D0-A1
-
NuMaker-IoT-MA35D1-A1
- NuMaker-IoT-M2354
- NuMaker-RTU-NUC980(Chili)
- NuMaker-Server-NUC980
- NuMaker-IIoT-NUC980
- NuMaker-IIoT-NUC980G2
-
NuMaker-IIoT-NUC980G2D
- NuMaker-Tomato
- NuMaker-IoT-M487
- NuMaker-PFM-M487
- NuMaker-PFM-M453
- NuMaker-PFM-NUC472
- NuMaker-PFM-M2351
- NuMaker-IoT-M263A
- NuMaker-PFM-NANO130
- NuMaker-Brick
- NuMaker-Uni
- Alexa Connect Kit Platform
- IoT Engine Platform(1)
- Arduino Compatible Platform(1)
- LoRa Platform
NCT7511Y
-
 Training Tool Learning Watch time - 5:3#Tool #Training #Learning #Intermediate #en - For more information, please visit Nuvoton Technology Website: https://bit.ly/3hVdcmC Buy now: https://direct.nuvoton.com/numaker-m251sd Contact us: SalesSupport@nuvoton.com
 -
 Training Tool Learning Watch time - 2:17#Tool #Training #Learning #Intermediate #en - For more information, please visit Nuvoton Technology Website: https://bit.ly/3hVdcmC Buy now: https://direct.nuvoton.com/numaker-m251sd Contact us: SalesSupport@nuvoton.com
 -
 Training Tool Learning Watch time - 2:11. Explain how to use ICP Programming Tool to update Nu-Link2-Pro's firmware. 2. Explain how to update the Nu-Link2-Pro's firmware by pressing the trigger button before power is on. Then the power is on and dragging files to the Nu-Link2 drive. - For more information, please visit Nuvoton Technology Website: https://bit.ly/3hVdcmC Buy now: https://bit.ly/3bk0AD8 Contact us: SalesSupport@nuvoton.com #en #Tool #Training #Intermediate #Learning
 -
 Training Tool Learning Watch time - 3:19This video introduces how to download and install Arm Keil, and its content includes how to use Nuvoton's product serial number to apply for an Arm Keil product serial number and how to receive a product serial number that can be used in the activation step. Help you to install and use Arm Keil easily, and through Nuvoton's product serial number, free (M0 series) or half price (M23, M4 series) use Arm Keil product serial number. #Tool #Training #Learning #Intermediate #en - For more information, please visit Nuvoton Technology Website: https://bit.ly/3hVdcmC Buy now: https://direct.nuvoton.com/numaker-m251sd Contact us: SalesSupport@nuvoton.com
 -
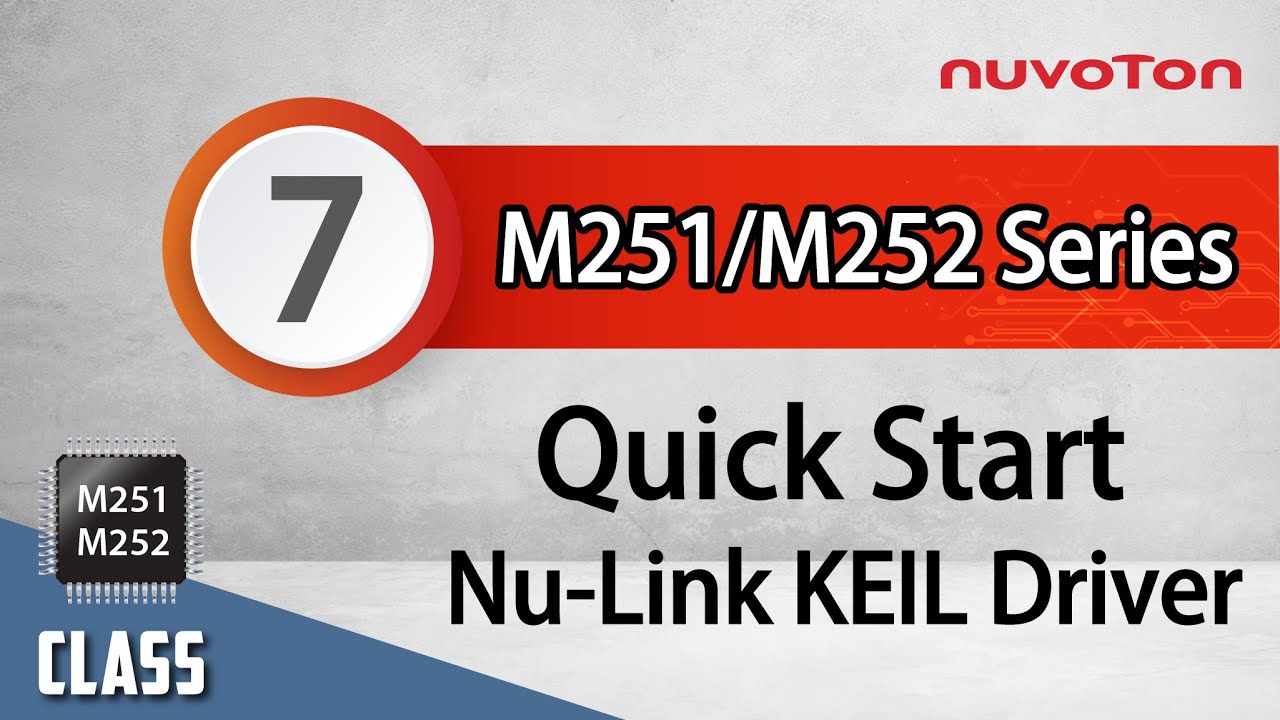 Training Tool Learning Watch time - 1:43This video introduces how to download and install the Nu-Link Keil driver. The content includes how to download the Nu-Link Keil driver from the Nuvoton website, as well as the things you need to pay attention to during installation, so that you can use Arm Keil faster and smoother. #Tool #Training #Learning #Intermediate #en - For more information, please visit Nuvoton Technology Website: https://bit.ly/3hVdcmC Buy now: https://direct.nuvoton.com/numaker-m251sd Contact us: SalesSupport@nuvoton.com
 -
 Training Tool Learning Watch time - 4:14The video will introduce you the NuMicro™ Family M251/M252 Series BSP, includes how to download the BSP and introduction of each sample codes and folders. And help you use the template to develop your first M251/M252 program. #Tool #Training #Learning #Intermediate #en - For more information, please visit Nuvoton Technology Website: https://bit.ly/3hVdcmC Buy now: https://direct.nuvoton.com/numaker-m251sd Contact us: SalesSupport@nuvoton.com
 -
 Training Tool Learning Watch time - 2:47#Tool #Training #Learning #Intermediate #en - For more information, please visit Nuvoton Technology Website: https://bit.ly/3hVdcmC Buy now: https://direct.nuvoton.com/numaker-m251sd Contact us: SalesSupport@nuvoton.com
 -
 Training Tool Learning Watch time - 2:49#Tool #Training #Learning #Intermediate #en - For more information, please visit Nuvoton Technology Website: https://bit.ly/3hVdcmC Buy now: https://direct.nuvoton.com/numaker-m251sd Contact us: SalesSupport@nuvoton.com
 -
 Product Learning Watch time - 5:0Introduce the waterproof and noise immunity of ML56 touch key. Hello! Everyone! I am Nuvoton FAE Tim. Today, I will show you the waterproof and noise immunity of ML56 touch key. First introduce the waterproof and noise immunity of ML56 touch key. Good waterproof function, support finger touch with 2 mm depth water droplet. IEC 61000-4-6 conducted noise immunity (CNI) with 10 Vrms noise voltage. Next, we will explain the related parameter settings of the ML56 touch key, and first explain the touch sensitivity. #Pulse Width (Touch key sensing pulse width time control) Touch key sensitivity can be adjusted by setting Pulse Width properly, shorter Pulse Width setting comes with poor sensitivity and less power-consumption, vice versa. Then explain the stability of touch performance, Part 1. #Times (Touch key sensing times control) Touch key raw data stability can be adjusted by setting Times properly, shorter Times setting comes with poor raw data stability and less power-consumption, vice versa. Stability of touch performance, Part 2. #IIR (IIR filter) IIR filter can control the ratio of current raw data and previous one. User can enable IIR Filter to be against noise. It will increase the touch response time when enables IIR Filter. Stability of touch performance, Part 3. #Debounce (Touch key debounce) Touch key stability can be adjusted by setting Debounce properly, the debounce times for touch key entry (on) and release (off) detection, shorter Debounce setting comes with faster touch response time, vice versa. Stability of touch performance, Part 4. #Trace Baseline (Baseline is generated by “Calibration”) Touch key auto environment compensation is an algorithm that baseline tracking each touch key automatically at power-up and keeps compensating environment variation affects touch key performance during runtime. Based on the above parameter description, the following introduces the waterproof and noise immunity parameter settings. The first is waterproof parameter setting. Good waterproof function, support finger touch with 2 mm depth water droplet. Touch key system parameters are shown in the table Pulse Width = 500 ns Times = 128 Next is the noise immunity parameter setting IEC 61000-4-6 conducted noise immunity (CNI) with 10 Vrms noise voltage. Touch key system parameters are shown in the table. Pulse Width = 2 us Times = 128 IIR New = 6, Old = 2 Debounce Entry = 1, Release = 1 Then we use the ML56 NuMaker Board to show you the waterproof function of the touch key. Dip the finger in water first, and then touch the touch key. Repeat the above actions, we can see that the touch key still works normally and is not affected. Finally, we use the ML56 NuMaker Board to show you the noise immunity ability of the touch key. Turn on the walkie-talkie first, and then interfere with the touch key at close range, we can see that the touch key still operate normally and is not affected. That's all for today's video, thank you everyone! If you have any questions, please contact us. - For more information, please visit Nuvoton Technology Website: https://bit.ly/3hVdcmC Buy now: https://direct.nuvoton.com/tw/low-power-8051-series/ Contact us: SalesSupport@nuvoton.comon.com #Product #Learning #Basic #en#Basic #ML56 #NuMicro #Pulse Width (Touch key sensing pulse width time control) #IIR (IIR filter) #Product #en #Trace Baseline (Baseline is generated by “Calibration”) #Times (Touch key sensing times control) #8051 #Learning #Debounce (Touch key debounce) #Nuvoton #touch key IC #noise immunity #low power #ML54 #waterproof #MCU #ML51
 -
 Training Tool Learning Watch time - 3:24Hello everyone I am Chris, the Field Application Engineer from Nuvoton Technology. Today I will introduce the programming and debugging tool, called NuLink-Gang, and NuLink2-Pro. And I will show you in what kind of situation you can utilize the tools. During system development, Nuvoton provides three IDE interfaces: KEIL, IAR, and NuEclipse for user to develop source code. When programming the Chip, Nuvoton provides ICP programming Tool in PC and the debugger Nu-Link2-Pro for users to perform debugging and programming function. User who uses all of the Nuvoton Nu-Maker boards series can develop through the Nu-Link2-Me debugger and programmer; it’s attached to the board. During the mass-production stage, there are 2 modes for programming the target chip. One is online programming and the other is offline programming. At first, in online programming mode, user can use ICP programming Tool and a Nu-Link2-Pro to program a target chip. Besides, if it needs to program several chips at one times, the Nu-Link Command Tool supports program multiple develop board by several Nu-Link2-Pro. Nu-Link2-Pro also supports drag-and-drop Flash programming. User can intuitively complete the programming action. Nu-Link2-Pro In offline programming mode, user can pre-store the programming file in SPI flash, USB flash drive, or SD card. When user wants to program the target chip, pressing the programming button on Nu-Link2-Pro to complete the programming action. If it needs a large number of ICs to be programming, it recommends using the Nu-Link-Gang programmer. Nu-Link-Gang programmer can perform offline programming on four different chips at a time, significantly increasing the programming efficiency. Besides, Nu-Link-Gang programmer can also use the control bus to connect with an automatic programming machine for automatic programming. In the system upgrade, Nu-Link2-Pro also provides five standard communication interfaces such as SPI, I2C, UART, RS485, and CAN for transmission, which is convenient for users to upgrade the system. That’s all for the introduction of Nuvoton’s programming and debugging tool, NuLink-Gang, and NuLink2-Pro. Thank you for watching it. If you want to know more details, please contact us! Thank you. #Tool #Training #Learning #Intermediate #en - For more information, please visit Nuvoton Technology Website: https://bit.ly/3hVdcmC Buy now: https://direct.nuvoton.com/numaker-m251sd Contact us: SalesSupport@nuvoton.com
 -
 Training Tool Learning Watch time - 5:9Hello everyone, I am Chris, the field application engineer from Nuvoton Technology. Today, I will introduce the application and principle of programmable seriel I/O aka PSIO on M251/M252. The programmable serial I/O of NuMicro M251/M252 series can generate arbitrary waveforms and combine them to achieve data transmission and reception of specific serial communication protocols. Of course, standard serial communication can also be achieved, such as UART SPI I2C Usually, it is common to use Timer+GPIO to achieve these specific communication protocols, but it is more complicated and requires frequent CPU intervention. When we use PSIO, this not only simplifies the complexity of the operation but also reduces the burden on the CPU. The saved CPU performance could be distributed in other places. Since all hardware operations do not require software intervention, the timing control is more precise. The principle of PSIO is to use a slot controller to control the pin input and output or determine the state, and it can also control the duration of these states. Each slot controller has eight slots, which can be used as eight settings, and the registers corresponding to each slot can access the data that needs to be input and output, and can also set the time for the current pin to maintain this state. Each slot can reach a checkpoint, usually 1 to 1, 2 to 2, 3 to 3, and so on. Each checkpoint can set the pin status of the corresponding slot within the corresponding time. Next, let’s take a look at a simple output-only example In the initial stage, we first set the state of the pin to be high before SLOT has started, so the output is high Then when the Slot controller receives the start signal, SLOT0 is set to output low level according to the setting of CP0 and waits for the time of SLOT0 to expire. Then SLOT1 is set to output low level according to the setting of CP1 and waits for the time of SLOT1 to expire. And so on, followed by SLOT2 output low level SLOT3 low level SLOT4 high level SLOT5 high level After SLOT5, since SLOT6 is not set, the waveform of the protocol can be completed with only six slots Between the time of the next data transmission, we set the interval low, so the output is low at this time Users can complete different protocols according to these simple operations. In the related resources section, we have provided two PSIO application notes. There are two protocol examples with more detailed operations and descriptions. If you want to know more details about PSIO, please download it from the URL in the video. Several sample codes of different protocols are also provided in BSP. That’s all for this tutorial. Thank you for watching it. Welcome to subscribe to our channel. If you want to know more information, please contact us. #Tool #Training #Learning #Intermediate #en - For more information, please visit Nuvoton Technology Website: https://bit.ly/3hVdcmC Buy now: https://direct.nuvoton.com/numaker-m251sd Contact us: SalesSupport@nuvoton.com
 -
 Training Tool Learning Watch time - 5:40Hello, everyone! I'm Chris, Field Application Engineer from Nuvoton Technology. Today, I will introduce you how to design NuMicro M251/ M252 application circuit. Let's start with the power application circuit of M251/M252. The external power should add 10uF and 0.1uF decoupling capacitors, and the capacitor should be placed close to the source of the external power supply. Before the external power enters the VDD/VDDIO/VBAT of the IC, 0.1uF bypass capacitors should be added separately, and the capacitors should be placed close to the IC. Before the external power enters the AVDD, the bead should be connected in series for filtering, and then 1uF, 0.1uF, and 0.01uF bypass capacitors should be added. The bead and capacitors should be placed close to the IC. Before connecting AVDD to VREF, first, connect the bead in series for filtering, and then add 2.2uF, 1uF, and 470pF bypass capacitors. The bead and capacitors should be placed close to the IC. A 1uF bypass capacitor should be added to the internal LDO power supply of the IC, and the capacitor should be placed close to the IC. AVSS and VSS should be connected in series with a bead for filtering. USB_VBUS should be connected in series with a 10-ohm resistor to enhance the ability of USB to resist EFT interference. USB_D+ and USB_D- should be connected in series with 27-ohm resistors for impedance matching. USB_VCC33_CAP needs to add a 1uF bypass capacitor. ICE_DAT and ICE_CLK should be connected to 100K ohm pull-up resistors. The two ends of the high-speed and low-speed crystal oscillators should be connected with an equivalent capacitance of 20pF to VSS. I2C_SCL and I2C_SDA should be connected to 4.7K ohm pull-up resistors. nRESET should be connected to a 10K ohm pull-up resistor and a 10 uF capacitor to VSS. The internal LDO power supply of the IC needs to add a 1 uF bypass capacitor, and the capacitor should be placed close to the IC. In addition, reference circuits for EBI, UART, SPI, and Audio are provided. VDD is connected to 4~32 MHz crystal oscillator, POR33, Power On Control, 5V to 1.5V LDO, IO Cell... and other circuits inside the IC. Among them, GPIO PF.4 to PF.6 and PA.0 to PA.5 output, the high level is equal to VDD. Vbus is connected to the USB 1.1 PHY inside the IC. This 1.5V regulator will provide 1.5V for Digital Logic, SRAM, Flash, POR15, LIRC, MIRC, HIRC... and so on. Vbat is connected to internal 1.5V RTC_LDO and provides 1.5V voltage for RTC, 32.768 kHz crystal oscillator, IO Cell PF.6. VDDIO is connected to some IO cell for use, and the output high level of PA.0 to PA.5 is equal to VDDIO. AVDD is connected to the analog circuit inside the IC, and VREF is the reference voltage of the analog circuit. That's all for the hardware design of the NuMicro M251/M252 series instruction. Thank you for watching it. If you have further questions, please contact us. #Tool #Training #Learning #Intermediate #en - For more information, please visit Nuvoton Technology Website: https://bit.ly/3hVdcmC Buy now: https://direct.nuvoton.com/numaker-m251sd Contact us: SalesSupport@nuvoton.com