Search
Search Results
SearchNuvoton Development Board ,
find 80 items
- Sort by
- Most recent
- Popularity

Product
Learning
Watch time - 5:0
Introduce the waterproof and noise immunity of ML56 touch key.
Hello! Everyone! I am Nuvoton FAE Tim.
Today, I will show you the waterproof and noise immunity of ML56 touch key.
First introduce the waterproof and noise immunity of ML56 touch key.
Good waterproof function, support finger touch with 2 mm depth water droplet.
IEC 61000-4-6 conducted noise immunity (CNI) with 10 Vrms noise voltage.
Next, we will explain the related parameter settings of the ML56 touch key, and first explain the touch sensitivity.
#Pulse Width (Touch key sensing pulse width time control)
Touch key sensitivity can be adjusted by setting Pulse Width properly, shorter Pulse Width setting comes with poor sensitivity and less power-consumption, vice versa.
Then explain the stability of touch performance, Part 1.
#Times (Touch key sensing times control)
Touch key raw data stability can be adjusted by setting Times properly, shorter Times setting comes with poor raw data stability and less power-consumption, vice versa.
Stability of touch performance, Part 2.
#IIR (IIR filter)
IIR filter can control the ratio of current raw data and previous one. User can enable IIR Filter to be against noise. It will increase the touch response time when enables IIR Filter.
Stability of touch performance, Part 3.
#Debounce (Touch key debounce)
Touch key stability can be adjusted by setting Debounce properly, the debounce times for touch key entry (on) and release (off) detection, shorter Debounce setting comes with faster touch response time, vice versa.
Stability of touch performance, Part 4.
#Trace Baseline (Baseline is generated by “Calibration”)
Touch key auto environment compensation is an algorithm that baseline tracking each touch key automatically at power-up and keeps compensating environment variation affects touch key performance during runtime.
Based on the above parameter description, the following introduces the waterproof and noise immunity parameter settings.
The first is waterproof parameter setting.
Good waterproof function, support finger touch with 2 mm depth water droplet. Touch key system parameters are shown in the table
Pulse Width = 500 ns
Times = 128
Next is the noise immunity parameter setting
IEC 61000-4-6 conducted noise immunity (CNI) with 10 Vrms noise voltage. Touch key system parameters are shown in the table.
Pulse Width = 2 us
Times = 128
IIR New = 6, Old = 2
Debounce Entry = 1, Release = 1
Then we use the ML56 NuMaker Board to show you the waterproof function of the touch key.
Dip the finger in water first, and then touch the touch key. Repeat the above actions, we can see that the touch key still works normally and is not affected.
Finally, we use the ML56 NuMaker Board to show you the noise immunity ability of the touch key.
Turn on the walkie-talkie first, and then interfere with the touch key at close range, we can see that the touch key still operate normally and is not affected.
That's all for today's video, thank you everyone!
If you have any questions, please contact us.
-
For more information, please visit Nuvoton Technology Website: https://bit.ly/3hVdcmC
Buy now: https://direct.nuvoton.com/tw/low-power-8051-series/
Contact us: SalesSupport@nuvoton.comon.com
#Product #Learning #Basic #en
#Basic
#ML56
#NuMicro
#Pulse Width (Touch key sensing pulse width time control)
#IIR (IIR filter)
#Product
#en
#Trace Baseline (Baseline is generated by “Calibration”)
#Times (Touch key sensing times control)
#8051
#Learning
#Debounce (Touch key debounce)
#Nuvoton
#touch key IC
#noise immunity
#low power
#ML54
#waterproof
#MCU
#ML51

Product
Learning
Watch time - 3:12
Hello! Everyone! I am Nuvoton FAE Tim.
Today, I will show you ML56 Capacitive Touch Key PCB Design.
First introduce the Touch Sensor Channel Selection.
Touch Sensor Channels.
ML56 series supports up to 14 touch sensor channels.
#Reference Sensor
It is recommended to select one reference sensor at touch sensor channel TK7 or TK14.
Maximize the distance between the reference sensor and other signals to minimize crosstalk.
#Shield Electrodes
Put the shield electrode around the touch sensor to get better signal quality and waterproof capability.
Recommended to select shield channel at touch TK0, TK4 or clock out pins (P3.2 / P4.6 / P5.7).
Next, we will explain the PCB Layout Rules.
#Touch Key Shapes
Recommended to have a 10 x 10 mm sensor area for good touch key sensitivity.
Larger touch sensor electrode work better for thicker cover.
#Reference Sensor
Recommended to assign the reference key at touch channel TK7 or TK14.
Maximize the distance to other signals to minimize crosstalk.
Round shape electrode with 1 mm diameter size is enough for normal case.
#Ground Plane
It is recommended that the traces of the touch key have a good hatched ground plane surround.
It is recommended to have hatched ground plane under the touch keys.
Hatched ground plane with 6 mil trace and 50 mil grid.
#Shield Electrode
Put touch keys with shield electrode around which provides the same phase signal around touch keys.
Hatched shield electrode with 6 mil trace and 50 mil grid.
Shield electrode area needs to keep filled around the touch key in greater than 10 mm width.
Finally, explain the Touch Key Cover Thickness.
As the cover thickness increases, the touch key sensitivities will decrease.
Larger touch key size work better for thicker cover.
Recommended touch key diameter size with difference acrylic cover thickness as shown in the table.
That's all for today's video, thank you everyone!
If you have any questions, please contact us.
-
For more information, please visit Nuvoton Technology Website: https://bit.ly/3hVdcmC
Buy now: https://direct.nuvoton.com/tw/low-power-8051-series/
Contact us: SalesSupport@nuvoton.comon.com
#Product #Learning #Basic #en

Product
Learning
Watch time - 6:27
Nuvoton provides a development tool for capacitive Touch Sensors. The best feature of the calibration tool is that it uses the GUI to configure and tune your design automatically. Besides, the tool can export the configuration parameters and import them to another. Not only can greatly shorten the development time of developers, but also shorten the time for mass production. This video will introduce how to use this development tool and the definition of parameter.
-
For more information, please visit Nuvoton Technology Website: https://bit.ly/3hVdcmC
Buy now: https://direct.nuvoton.com/tw/low-power-8051-series/
Contact us: SalesSupport@nuvoton.comon.com
#Product #Learning #Basic #en

Training
Learning
Watch time - 4:0
Take Nuvoton NuMaker-IIoT-NUC980 running Linux as the platform and learn how to develop various functions. Watch this video and you will learn how to install Buildroot for NuMaker-IIoT-NUC980 board before starting development.
-
For more information, please visit Nuvoton Technology Website: https://bit.ly/3hVdcmC
Buy now: https://direct.nuvoton.com/tw/numaker-nuc980-iiot
Contact us: SalesSupport@nuvoton.com
#Training #Learning #Basic #en

Training
Tool
Learning
Watch time - 3:24
Hello everyone I am Chris, the Field Application Engineer from Nuvoton Technology.
Today I will introduce the programming and debugging tool, called NuLink-Gang, and NuLink2-Pro. And I will show you in what kind of situation you can utilize the tools.
During system development, Nuvoton provides three IDE interfaces: KEIL, IAR, and NuEclipse for user to develop source code.
When programming the Chip, Nuvoton provides ICP programming Tool in PC and the debugger Nu-Link2-Pro for users to perform debugging and programming function.
User who uses all of the Nuvoton Nu-Maker boards series can develop through the Nu-Link2-Me debugger and programmer; it’s attached to the board.
During the mass-production stage, there are 2 modes for programming the target chip. One is online programming and the other is offline programming.
At first, in online programming mode, user can use ICP programming Tool and a Nu-Link2-Pro to program a target chip. Besides, if it needs to program several chips at one times, the Nu-Link Command Tool supports program multiple develop board by several Nu-Link2-Pro.
Nu-Link2-Pro also supports drag-and-drop Flash programming. User can intuitively complete the programming action.
Nu-Link2-Pro
In offline programming mode, user can pre-store the programming file in SPI flash, USB flash drive, or SD card. When user wants to program the target chip, pressing the programming button on Nu-Link2-Pro to complete the programming action.
If it needs a large number of ICs to be programming, it recommends using the Nu-Link-Gang programmer. Nu-Link-Gang programmer can perform offline programming on four different chips at a time, significantly increasing the programming efficiency. Besides, Nu-Link-Gang programmer can also use the control bus to connect with an automatic programming machine for automatic programming.
In the system upgrade, Nu-Link2-Pro also provides five standard communication interfaces such as SPI, I2C, UART, RS485, and CAN for transmission, which is convenient for users to upgrade the system.
That’s all for the introduction of Nuvoton’s programming and debugging tool, NuLink-Gang, and NuLink2-Pro. Thank you for watching it. If you want to know more details, please contact us! Thank you.
#Tool #Training #Learning #Intermediate #en
-
For more information, please visit Nuvoton Technology Website: https://bit.ly/3hVdcmC
Buy now: https://direct.nuvoton.com/numaker-m251sd
Contact us: SalesSupport@nuvoton.com

Training
Tool
Learning
Watch time - 2:21
Hello everyone! I am Chris, the Field Application Engineer from Nuvoton Technology.
Today, I will introduce how to run a simple sample code on NuMicro M251/M252 series microcontroller.
First, we connect the M251/M252 NuMaker development Board to the computer.
Then click the M251/M252 BSP folder, click the Sample Code folder, template folder, Keil folder, and finally open the Template project file.
What we are going to do is running a simple GPIO Toggle LED Sample Code.
Introduce the main program briefly.
First, set GPIO PB14 to Output Mode.
After writing a small loop, set PB14 to reverse.
Finally, set CLK_SysTickDelay to 300,000 microseconds (uSec).
Before Rebuild, we must add the GPIO Source Code to the Library, find the corresponding Source Code and load it, and press Rebuild after it is complete. After the Rebuild, press Load and program the Code into the IC.
When programing is over, press the reset button on the development board to confirm whether the LED lights are flashing on the board.
That’s all for the tutorial of running sample code. Thank you for watching it. If you want to know more information, please feel free to contact us.
#Tool #Training #Learning #Intermediate #en
-
For more information, please visit Nuvoton Technology Website: https://bit.ly/3hVdcmC
Buy now: https://direct.nuvoton.com/numaker-m251sd
Contact us: SalesSupport@nuvoton.com

Product
Learning
Watch time - 14:8
For more information, please visit Nuvoton Technology Website: https://bit.ly/3hVdcmC
Buy now: https://direct.nuvoton.com/numaker-m251sd
Contact us: SalesSupport@nuvoton.com
#Product #Learning #Basic #en
0:00 簡介
0:29 Nuvoton Low Power Microcontroller Family
1:24 NuMicro M251 Series Overview
3:31 M251 & M252 Low Power Series
4:08 M251 Series Remarkable Features
7:14 M251/M252 Power Mode
9:37 I NuMicro MCU Applications
12:09 Development Tools

Training
Tool
Learning
Watch time - 5:53
Hello everyone, I am Morgan, the principal engineer of Nuvoton Technology. Today, I will show you how to connect to AWS IoT service using MbedOS on NuMaker-IoT-M487 development board
The sample code is on GitHub, the URL is https://github.com/OpenNuvoton/Mbed-to-AWS-IoT
To avoid typos, use keyword “OpenNuvoton” to search on google.
Find the Nuvoton on GitHub, and click it
On the Nuvoton GitHub page, use AWS as keyword to search the sample code: Mbed-to-AWS-IoT
Right click to copy the URL for later use.
Then enter the URL https://ide.mbed.com
After log in, make sure the NuMaker-IoT-M487 board has selected in the upper right corner. If not, please refer Nuvoton IoT Tutorial series “Get Started with Mbed OS”. There is detailed description of how to add a board.
Click the “Import” on the left of menu bar.
In the “Import Wizard”, click “Click here”
Please paste or key in the sample code URL to “Source URL:”,
Select Import as “Program”
Click “Import Name”, the project name “Mbed-to-AWS-IoT” will be filled automatically.
Then click “Import”.
After sample code imported, click “mbed_app.json” to open it.
To use Wi-Fi, you have to configure SSID and password to match your Wi-Fi AP setting.
In NuMaker_IOT_M487 session of mbed_app.json file, find the “wifi-ssid” to set your SSID. It is at line 44.
And then set password to “wifi-password”. It is at line 45.
Save it and click “Compile” to build the code.
It takes time to compile code, please wait.
You need an AWS account to use AWS IoT Core service. To create a thing, a policy, and certificates, then put the certificate to MQTT_server_setting.h file in the sample code. The sample code has included a certificate provided by Nuvoton for test only, so that you can quickly operate this example. If you don’t have an AWS account, it is recommended that you apply for an account and use your certificates in the example to observe the connection status on AWS IoT console page.
After completed, “Success” will appear in the compile output window.
The browser downloads the binary firmware file directly after a successful compiling. It will be saved in a default download folder. In Chrome, you can click download file and select “Show in folder”.
Then we connect the NuMaker-IoT-M487 USB port to your computer.
Please find the virtual COM port assigned for NuMaker-IoT-M487 in Device Manager. In the tutorial, the “Nu-Link Virtual Com Port” is COMx.
Then use your favorite terminal tool. Here we use Putty. Open the COMx port with 115200 baud rate.
And no flow control settings. Then “Open” it.
Back to the folder you just download the binary firmware file (Mbed-to-AWS-IoT.NUMAKER_IOT_M487.bin). Drag and drop the file to NuMicro MCU drive.
You will see the copying progress dialog box.
You can see the messages on terminal.
The device has acquired IP address from Wi-Fi AP, then successfully connect to AWS IoT and subscribe a topic.
Then press button (SW2) on board to send a message.
You can see the message published to server and received a message from server.
That’s all for this tutorial. Thank you for watching.
Welcome to subscribe to our channel.
If you want to get more information, please contact us “SalesSupport@nuvoton.com”
-
For more information, please visit Nuvoton Technology Website: https://bit.ly/3hVdcmC
Buy now: https://direct.nuvoton.com/tw/numaker-iot-m487
Contact us: SalesSupport@nuvoton.com
#tool #training #learning #intermediate #en

Product
Application
Webinar
Watch time - 59:3
Developing IoT devices can be a painful process. In this webinar, you will learn how to develop an IoT enabled device quickly and easily with Nuvoton IoT platforms. We will cover IoT device system architectures, security consideration, development kits for different cloud services, and the latest practices to bring your IoT products time to market quickly.
Speaker: UE00 Senior Product Marketing Manager, Harry Chen
-
For more information, please visit Nuvoton Technology Website: https://bit.ly/3hVdcmC
Buy now: https://bit.ly/3bk0AD8
Contact us: SalesSupport@nuvoton.com
#Product #Application #Webinar #General #en

Application
Learning
Watch time - 4:3
The purpose of video is to demonstrate functions of NuMaker-RTU-NUC980 within 5 minutes, including Ethernet webserver, Wi-Fi webserver, USB camera, and NFS function.
If you get the NuMaker-RTU-NUC980 board, you can follow this video to implement all the functions
#application #learning #intermediate #en
-
For more information, please visit: https://bit.ly/3hVdcmC
Buy now: https://direct.nuvoton.com/tw/numaker-rtu-nuc980?search_query=Chili&results=1
Contact us: SalesSupport@nuvoton.com

Application
Learning
Watch time - 1:30
Nuvoton provides a new development platform, Chili. Chili is designed by NUC980 family. A user can begin application developing within 15 minutes once receiving this PCB. This PCB is very small and can be easily installed into another system after development complete. It is suitable for some remote control or IoT applications.
#application #learning #intermediate #en
-
For more information, please visit Nuvoton Technology Website: https://bit.ly/3hVdcmC
Buy now: https://direct.nuvoton.com/tw/numaker-rtu-nuc980?search_query=Chili&results=1
Contact us: SalesSupport@nuvoton.com
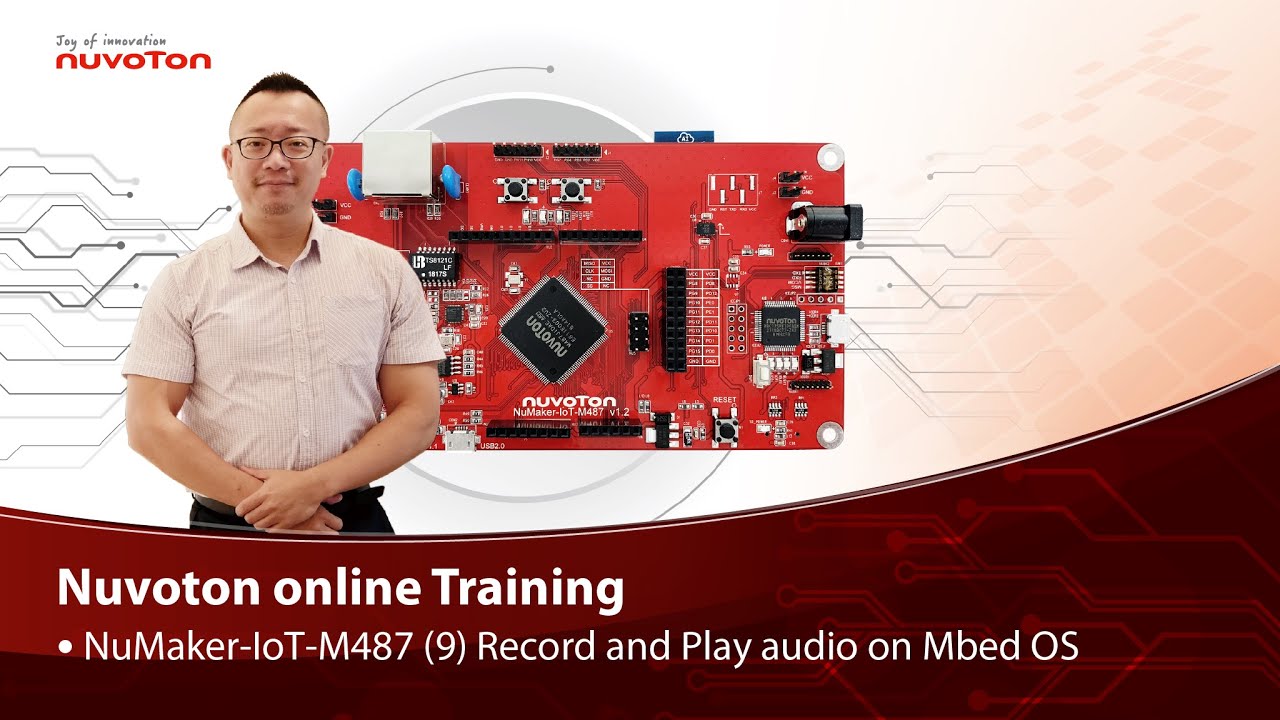
Training
Tool
Learning
Watch time - 5:0
Hello everyone, I am Morgan, the principal engineer of Nuvoton Technology. Today, I will show you how to record and play audio with Mbed OS on NuMaker-IoT-M487 development board.
Open Chrome browser, and enter the URL https://ide.mbed.com to use the Mbed Online Compiler.
After log in, make sure that NuMaker-IoT-M487 board already selected in the upper right corner. If not, please refer Nuvoton IoT Tutorial series “Get Started with Mbed OS” which has a detailed description of how to add a board.
Click the “New” on the left of menu bar, a “Create new program” window will be displayed.
You can see that the Platform has been set to NuMaker-IoT-M487. In the Template, select the "NuMaker audio playback" for this tutorial. Then click OK.
Now you can see that the sample code has loaded on the page.
The sample code has three functions:
1. Record 10 seconds sound and save to Micro SD card
2. Play sounds stored in Micro SD card
3. Loopback. Record sound and play it immediately.
Click main.cpp to open it. Then scroll down to line 421. You can see the functions calls here. It set to loopback only.
Let’s do a little modification. Hit a key on console to start record 10 seconds then play it, and then do loopback.
printf("Press a key to start recording 10 seconds...");
getchar();
demo_record();
demo_play();
demo_loopback();
Save it and click “Compile” to build the code.
Compilation takes a while, please wait.
After the compilation is completed, “Success” will appear in the compile output window.
The browser downloads the binary firmware file directly after a successful compiling. It will be saved in a default download folder. In Chrome, you can click download file and select “Show in folder”.
Please plug an earphone commonly used for mobile phone in headphone jack on NuMaker-IoT-M487 board. For demonstration, we use a headphone splitter cable to connect a microphone and a speaker. Do not put the microphone and speaker too close to avoid feedback howling. Then connect the USB port to your computer and make sure the onboard LED lights up.
Back to the folder you just download the binary firmware file (NuMaker-mbed-AudioPlayback-example.NUMAKER_IOT_M487.bin). Drag and drop the file to NuMicro MCU drive.
You will see the copying progress dialog box.
Please find the virtual COM port assigned for NuMaker-IoT-M487 in Device Manager. In the demonstration, the “Nu-Link Virtual Com Port” is COMx.
Then use your favorite terminal tool. Here we use Putty. Open the COMx port with 9600 baud rate.
And no flow control settings. Then “Open” it.
Press “Reset” on board to run the firmware again.
Press a key on terminal to start record.
Speak for about 10 seconds, then your voice will be played.
That’s all for this tutorial. Thank you for watching.
Welcome to subscribe to our channel.
If you want to get more information, please contact us “SalesSupport@nuvoton.com”
-
For more information, please visit Nuvoton Technology Website: https://bit.ly/3hVdcmC
Buy now: https://direct.nuvoton.com/tw/numaker-iot-m487
Contact us: SalesSupport@nuvoton.com
#tool #training #learning #intermediate #en