Search
Search Results
SearchNFS function ,
find 38 items
- Sort by
- Most recent
- Popularity

Watch time - 3:13
Take Nuvoton NuMaker-IIoT-NUC980 running Linux as the platform and learn how to develop various functions. Watch this video, you will learn how to control GPIO to blink the LED on NuMaker-IIoT-NUC980 board.
-
For more information, please visit Nuvoton Technology Website: https://bit.ly/3hVdcmC
Buy now: https://direct.nuvoton.com/tw/numaker-nuc980-iiot
Contact us: SalesSupport@nuvoton.com

Product
Learning
Watch time - 6:6
Nuvoton announced the latest ML56 microcontroller, built-in capacitive touch sensing, LCD driver highly integrated low power platform. And provides capacitive touch sensor and LCD driver library. The solution is delivered through the API guide, which includes details on each function call, parameters and returns. Finally, this video provides an overview on how to develop a custom touch key and LCD application from the BSP release.
-
For more information, please visit Nuvoton Technology Website: https://bit.ly/3hVdcmC
Buy now: https://direct.nuvoton.com/tw/low-power-8051-series/
Contact us: SalesSupport@nuvoton.comon.com
#Product #Learning #Basic #en

Product
Learning
Watch time - 5:0
Introduce the waterproof and noise immunity of ML56 touch key.
Hello! Everyone! I am Nuvoton FAE Tim.
Today, I will show you the waterproof and noise immunity of ML56 touch key.
First introduce the waterproof and noise immunity of ML56 touch key.
Good waterproof function, support finger touch with 2 mm depth water droplet.
IEC 61000-4-6 conducted noise immunity (CNI) with 10 Vrms noise voltage.
Next, we will explain the related parameter settings of the ML56 touch key, and first explain the touch sensitivity.
#Pulse Width (Touch key sensing pulse width time control)
Touch key sensitivity can be adjusted by setting Pulse Width properly, shorter Pulse Width setting comes with poor sensitivity and less power-consumption, vice versa.
Then explain the stability of touch performance, Part 1.
#Times (Touch key sensing times control)
Touch key raw data stability can be adjusted by setting Times properly, shorter Times setting comes with poor raw data stability and less power-consumption, vice versa.
Stability of touch performance, Part 2.
#IIR (IIR filter)
IIR filter can control the ratio of current raw data and previous one. User can enable IIR Filter to be against noise. It will increase the touch response time when enables IIR Filter.
Stability of touch performance, Part 3.
#Debounce (Touch key debounce)
Touch key stability can be adjusted by setting Debounce properly, the debounce times for touch key entry (on) and release (off) detection, shorter Debounce setting comes with faster touch response time, vice versa.
Stability of touch performance, Part 4.
#Trace Baseline (Baseline is generated by “Calibration”)
Touch key auto environment compensation is an algorithm that baseline tracking each touch key automatically at power-up and keeps compensating environment variation affects touch key performance during runtime.
Based on the above parameter description, the following introduces the waterproof and noise immunity parameter settings.
The first is waterproof parameter setting.
Good waterproof function, support finger touch with 2 mm depth water droplet. Touch key system parameters are shown in the table
Pulse Width = 500 ns
Times = 128
Next is the noise immunity parameter setting
IEC 61000-4-6 conducted noise immunity (CNI) with 10 Vrms noise voltage. Touch key system parameters are shown in the table.
Pulse Width = 2 us
Times = 128
IIR New = 6, Old = 2
Debounce Entry = 1, Release = 1
Then we use the ML56 NuMaker Board to show you the waterproof function of the touch key.
Dip the finger in water first, and then touch the touch key. Repeat the above actions, we can see that the touch key still works normally and is not affected.
Finally, we use the ML56 NuMaker Board to show you the noise immunity ability of the touch key.
Turn on the walkie-talkie first, and then interfere with the touch key at close range, we can see that the touch key still operate normally and is not affected.
That's all for today's video, thank you everyone!
If you have any questions, please contact us.
-
For more information, please visit Nuvoton Technology Website: https://bit.ly/3hVdcmC
Buy now: https://direct.nuvoton.com/tw/low-power-8051-series/
Contact us: SalesSupport@nuvoton.comon.com
#Product #Learning #Basic #en
#Basic
#ML56
#NuMicro
#Pulse Width (Touch key sensing pulse width time control)
#IIR (IIR filter)
#Product
#en
#Trace Baseline (Baseline is generated by “Calibration”)
#Times (Touch key sensing times control)
#8051
#Learning
#Debounce (Touch key debounce)
#Nuvoton
#touch key IC
#noise immunity
#low power
#ML54
#waterproof
#MCU
#ML51

Training
Learning
Watch time - 4:0
Take Nuvoton NuMaker-IIoT-NUC980 running Linux as the platform and learn how to develop various functions. Watch this video and you will learn how to install Buildroot for NuMaker-IIoT-NUC980 board before starting development.
-
For more information, please visit Nuvoton Technology Website: https://bit.ly/3hVdcmC
Buy now: https://direct.nuvoton.com/tw/numaker-nuc980-iiot
Contact us: SalesSupport@nuvoton.com
#Training #Learning #Basic #en

Training
Tool
Learning
Watch time - 3:24
Hello everyone I am Chris, the Field Application Engineer from Nuvoton Technology.
Today I will introduce the programming and debugging tool, called NuLink-Gang, and NuLink2-Pro. And I will show you in what kind of situation you can utilize the tools.
During system development, Nuvoton provides three IDE interfaces: KEIL, IAR, and NuEclipse for user to develop source code.
When programming the Chip, Nuvoton provides ICP programming Tool in PC and the debugger Nu-Link2-Pro for users to perform debugging and programming function.
User who uses all of the Nuvoton Nu-Maker boards series can develop through the Nu-Link2-Me debugger and programmer; it’s attached to the board.
During the mass-production stage, there are 2 modes for programming the target chip. One is online programming and the other is offline programming.
At first, in online programming mode, user can use ICP programming Tool and a Nu-Link2-Pro to program a target chip. Besides, if it needs to program several chips at one times, the Nu-Link Command Tool supports program multiple develop board by several Nu-Link2-Pro.
Nu-Link2-Pro also supports drag-and-drop Flash programming. User can intuitively complete the programming action.
Nu-Link2-Pro
In offline programming mode, user can pre-store the programming file in SPI flash, USB flash drive, or SD card. When user wants to program the target chip, pressing the programming button on Nu-Link2-Pro to complete the programming action.
If it needs a large number of ICs to be programming, it recommends using the Nu-Link-Gang programmer. Nu-Link-Gang programmer can perform offline programming on four different chips at a time, significantly increasing the programming efficiency. Besides, Nu-Link-Gang programmer can also use the control bus to connect with an automatic programming machine for automatic programming.
In the system upgrade, Nu-Link2-Pro also provides five standard communication interfaces such as SPI, I2C, UART, RS485, and CAN for transmission, which is convenient for users to upgrade the system.
That’s all for the introduction of Nuvoton’s programming and debugging tool, NuLink-Gang, and NuLink2-Pro. Thank you for watching it. If you want to know more details, please contact us! Thank you.
#Tool #Training #Learning #Intermediate #en
-
For more information, please visit Nuvoton Technology Website: https://bit.ly/3hVdcmC
Buy now: https://direct.nuvoton.com/numaker-m251sd
Contact us: SalesSupport@nuvoton.com

Application
Learning
Watch time - 4:3
The purpose of video is to demonstrate functions of NuMaker-RTU-NUC980 within 5 minutes, including Ethernet webserver, Wi-Fi webserver, USB camera, and NFS function.
If you get the NuMaker-RTU-NUC980 board, you can follow this video to implement all the functions
#application #learning #intermediate #en
-
For more information, please visit: https://bit.ly/3hVdcmC
Buy now: https://direct.nuvoton.com/tw/numaker-rtu-nuc980?search_query=Chili&results=1
Contact us: SalesSupport@nuvoton.com
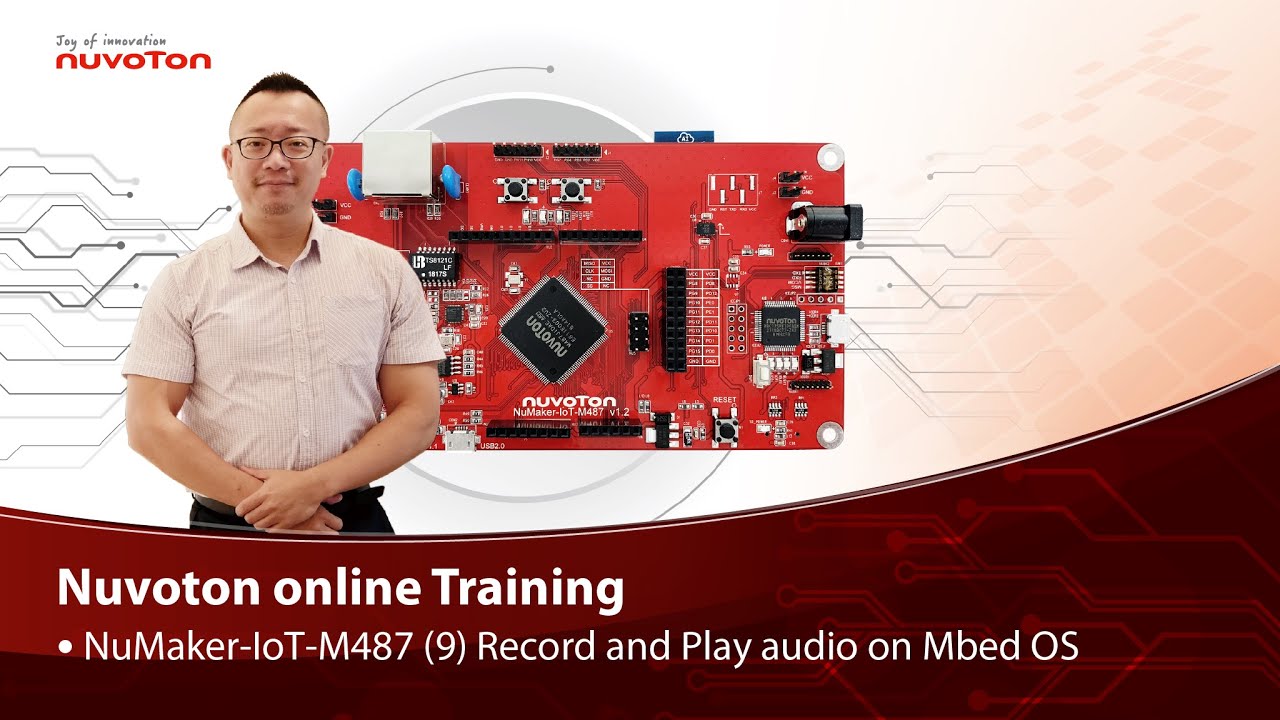
Training
Tool
Learning
Watch time - 5:0
Hello everyone, I am Morgan, the principal engineer of Nuvoton Technology. Today, I will show you how to record and play audio with Mbed OS on NuMaker-IoT-M487 development board.
Open Chrome browser, and enter the URL https://ide.mbed.com to use the Mbed Online Compiler.
After log in, make sure that NuMaker-IoT-M487 board already selected in the upper right corner. If not, please refer Nuvoton IoT Tutorial series “Get Started with Mbed OS” which has a detailed description of how to add a board.
Click the “New” on the left of menu bar, a “Create new program” window will be displayed.
You can see that the Platform has been set to NuMaker-IoT-M487. In the Template, select the "NuMaker audio playback" for this tutorial. Then click OK.
Now you can see that the sample code has loaded on the page.
The sample code has three functions:
1. Record 10 seconds sound and save to Micro SD card
2. Play sounds stored in Micro SD card
3. Loopback. Record sound and play it immediately.
Click main.cpp to open it. Then scroll down to line 421. You can see the functions calls here. It set to loopback only.
Let’s do a little modification. Hit a key on console to start record 10 seconds then play it, and then do loopback.
printf("Press a key to start recording 10 seconds...");
getchar();
demo_record();
demo_play();
demo_loopback();
Save it and click “Compile” to build the code.
Compilation takes a while, please wait.
After the compilation is completed, “Success” will appear in the compile output window.
The browser downloads the binary firmware file directly after a successful compiling. It will be saved in a default download folder. In Chrome, you can click download file and select “Show in folder”.
Please plug an earphone commonly used for mobile phone in headphone jack on NuMaker-IoT-M487 board. For demonstration, we use a headphone splitter cable to connect a microphone and a speaker. Do not put the microphone and speaker too close to avoid feedback howling. Then connect the USB port to your computer and make sure the onboard LED lights up.
Back to the folder you just download the binary firmware file (NuMaker-mbed-AudioPlayback-example.NUMAKER_IOT_M487.bin). Drag and drop the file to NuMicro MCU drive.
You will see the copying progress dialog box.
Please find the virtual COM port assigned for NuMaker-IoT-M487 in Device Manager. In the demonstration, the “Nu-Link Virtual Com Port” is COMx.
Then use your favorite terminal tool. Here we use Putty. Open the COMx port with 9600 baud rate.
And no flow control settings. Then “Open” it.
Press “Reset” on board to run the firmware again.
Press a key on terminal to start record.
Speak for about 10 seconds, then your voice will be played.
That’s all for this tutorial. Thank you for watching.
Welcome to subscribe to our channel.
If you want to get more information, please contact us “SalesSupport@nuvoton.com”
-
For more information, please visit Nuvoton Technology Website: https://bit.ly/3hVdcmC
Buy now: https://direct.nuvoton.com/tw/numaker-iot-m487
Contact us: SalesSupport@nuvoton.com
#tool #training #learning #intermediate #en

Training
Tool
Learning
Watch time - 8:57
Hello everyone, I am the principal engineer of Nuvoton Technology, Morgan. The development board we are using today is Nuvoton’s NuMaker-IoT-M487. It is powered by the NuMicro M487 microcontroller with Arm Cortex-M4 core, built-in RJ45 Ethernet, and Wi-Fi module allowing users to connect to clouds by wire or wirelessly. It supports several RTOS including Arm Mbed OS, Amazon FreeRTOS, and AliOS Things.
Today, I will show you how to use Mbed OS on the NuMaker-IoT-M487 development board.
First, open Chrome browser, enter the URL https://os.mbed.com to register an account if you don’t have one.
Move the mouse cursor to the human icon in the upper right corner then click “Log in or Sign up” or click “Sign up for free” directly.
Then click “Sign up”
Fill in your e-mail address and relevant information, and finally click Sign up. Check your mailbox to receive the certification letter and authorize it.
Then let’s log in to use the online compiler environment. Move to the human icon in the upper right corner, and then click “Log in or Sign up”. And enter your account and password. After a successful login, it will return to the first page and then click “Compiler” on the left side of the human icon. It will lead us to the online compiler web page.
The following demonstration is all operated on this page
Click “No device selected” in the upper right corner to add and select Nuvoton’s NuMaker-IoT-M487 development board.
It opens the “Select a Platform” page. We click the button, show “Add Board” with green “+”, in the lower-left corner.
Next, it shows the page, let us choose a board.
Scroll down to find NuMaker-IoT-M487, and click it. It opens the NuMaker-IoT-M487 board page (https://os.mbed.com/platforms/NUMAKER-IOT-M487/). Scroll down the page to find the button “+Add to your Mbed Compiler”, and click it.
Click “Compiler” on top of the page to return to the online compiler environment. If the “NuMaker-IoT-M487” small icon appears in the upper right corner, you can start to import a sample code. Otherwise, click “No device selected” again. At this time, you can see the NuMaker-IoT-M487 icon already in the “Select a Platform” dialog box, click the icon to select it and then click “Select Platform” in the upper right corner.
It returns to the online compiler page, and the “NuMaker-IoT-M487” icon shows in the top right corner. You can now start to import a sample code.
First, click “New” on the top left side, a small “Create new program” dialog box appears. The “Platform” selects “NuMaker-IoT-M487” automatically. In the “Template” field, please select “mbed OS Blinky HelloWorld” example code, click OK.
You can see the sample project has been loaded on the page, click “main.cpp” to show the source code. Let’s add a printf() function to print out a string in the main program.
Check if statements are correct, save it, and click “Compile” to build code.
Now it’s compiling, let’s wait for a moment.
And you can see a lot of messages at the bottom of the page. The last message is “Success!”
The browser will download the binary firmware file directly after a successful compiling. It will be saved in a default download folder or any folder based on your browser setting. In Chrome, you can click download file and select “Show in folder”.
Then we need to connect the NuMaker-IoT-M487 USB port to your computer and make sure the onboard LED lights up.
Let’s head back to the download folder where you can see the binary firmware file (mbed-os-example-blinky.NUMAKER_IOT_M487.bin). Drag and drop the file to NuMicro MCU drive.
You will see the copying progress dialog box. After the copy is completed, the firmware starts to execute. One LED on board starts blinking. To see the printout message, go on the following steps.
Please find the virtual COM port assigned for NuMaker-IoT-M487 in Device Manager. In the demonstration, the “Nu-Link Virtual Com Port” is COMx.
Then use your terminal tool of choice. Here we use Putty. Open the COMx port with 9600 baud rate, 8 bits, 1 stop bit, none parity, and no flow control settings.
You can see “Hello World!” printed in the terminal.
That’s all for this tutorial. Thank you for watching.
If you want to know more information, please contact us at SalesSupport@nuvoton.com
-
For more information, please visit Nuvoton Technology Website: https://bit.ly/3hVdcmC
Buy now: https://direct.nuvoton.com/tw/numaker-iot-m487
Contact us: SalesSupport@nuvoton.com
#Tool #Training #Learning #Intermediate #en

Product
Learning
Watch time - 26:19
The ML51 is a Flash embedded 1T 8051-based microcontroller. The instruction set of the ML51 is fully compatible with the standard 80C51 with performance enhanced and low power consumption.
The ML51 runs up to 24 MHz at a wide voltage range from 1.8V to 5.5V, and contains up to 64/32/16/8 Kbytes Flash called APROM for programming code. The ML51 Flash supports In-Application-Programming (IAP) function, which enables on-chip firmware updates.
The ML51 includes an additional configurable up to 4/3/2/1 Kbytes Flash area called LDROM, in which the Boot Code normally resides for carrying out the In-System-Programming (ISP).
-
For more information, please visit Nuvoton Technology Website: https://bit.ly/3hVdcmC
buy now: https://direct.nuvoton.com/tw/ml51-series/
contact us: SalesSupport@nuvoton.com
#Product #Learning #Basic #en
0:00 簡介
0:20 Agenda
0:45 NuMicro Product Portfolio
1:28 2019 Brand New MCU Platform
2:06 ML51/ML54/ML56 Series Portfolio
3:29 ML51 Series Low
4:50 NuMicro Naming Rule
6:06 NuMicro® ML51 Features
8:19 4 Different Power Modes
10:44 Low Power Mode Features • Wake up resource: WKT, ACMP, GPIO
12:37 Low Power VS Battery Life
13:28 ADC
15:00 Comparison of 8-bit Products Feature
17:13 Fire Fighting System
21:30 Battery Management System (BMS)
22:30 Gaming Phone
23:36 Development Board
24:13 Development Environment

Home automation with the tubular motor adopting Nuvoton 8-bit industrial microcontroller ML51 series
Watch time - 4:33
Tubular motors can be easily seen everywhere such as curtains, rolling doors, and automatic clothes racks. As the concept of home automation is spreading widely, those products become more and more popular.
Nuvoton provides completed platform, ML51 series for different needs of tubular motors. It’s based on 1-T 8051 core, running up to 24 MHz core speed. It provides 12-bit ADC detecting motor current and up to 2 sets of analog comparators for overcurrent and overvoltage protection. Much higher safety features for the tubular motors are realized.
105-degree high-temperature resistance makes it suitable for control box exposed outdoors. As for the multiple noises and inference environment, ML51 series provides strong immunity like 8 kV ESD and 4.4 kV EFT.
Hello, everyone, welcome back to Nuvoton’s YouTube channel, I am the product manager of microcontrollers. Today I am going to show
you our successful story, home automation with the Tubular motor, which adopts our latest industrial microcontroller, ML51 series.
Today the topic we are going to talk about is the home automation and motorization system for curtain and doors. These tubular motors can be easily seen around everywhere, like curtain, rolling door, garage door, and automatic clothes rake…and so on. As the concept of home
automation is spreading widely, those products are more and more popular.
For example, the automatic curtain is popularly applied in hotel, new building, hospital and new store, why is this product become more and more popular? Lazy economy becomes a new type of consumption demand, people pursue a time-saving and labor-saving product,
imagined if you have an emitter to control curtain automatically, and smart adjustment with the brightness of outdoor. And the new product hit the shelf is automatic clothes rake, now this new product is not only a hanger but also integrated with UV light disinfection, heating function and fan controller. About the garage door, now integrated more security function, such as overcurrent protection for device longevity, infrared system can be added to increase anti-pinch security.
Nuvoton provides completed platform, ML51 series for different needs of tubular motors. It’s based on 1-T 8051 core, running at 24MHz core speed, provides 12-bit ADC can detect motor current, up
to 2 sets of analog comparator to have overcurrent and over voltage protection so can provide much higher safety feature for the tubular motors. ML51 series also provide from 1.8V to 5V power supply, so whether the AC power or the battery supplied can easily be adapts to different power source.
This series has up to 105-degree high temperature resistance, which also can be very suitable for control box explore at outdoors. As for the multiple noise and inference environment, ML51 series provides strong immunity like 8 kV ESD and 4.4 kV EFT.
Nuvoton provides an easy-to-use development environment, which includes NuMaker board, Nu-Link, BSP and sample codes, those
tools can help you shorten your development cycles. On the backside of each development board, you can find the website which the comprehensive information is available.
Nuvoton has some successful case in China and Europe. We hope to have more new opportunities after releasing this video.
Thanks for watching, if you like this video
please give it a thumbs up, if you have any question can also leave a message at bottom, we will have personal to reply the question soon. The ML51 NuMaker boards are now available at Nuvoton official eStore direct.nuvoton.com. Thank you again for staying with us. Hope to see you soon. Bye~
For more information, please visit Nuvoton Technology Website: https://bit.ly/3hVdcmC
buy now: NuMaker-ML51PC/ http://direct.nuvoton.com/numaker-ml51pc
NuTiny-ML51EB9AE/ https://direct.nuvoton.com/tw/nutiny-ml51eb9ae
contact us: SalesSupport@nuvoton.com

Watch time - 3:31
以新唐 NuMaker NUC980 IIoT 為平台,使用 Linux 進行開發,學習開發各式功能,觀看本片,您將學會如何控制 GPIO 使 LED 閃爍。
哈囉大家好,我是新唐工程師 Kevin,今天為大家介紹如何在 NuMaker NUC980 IIoT 板子上透過 GPIO 讓 LED 燈閃爍。
NuMaker NUC980 IIoT 板子的 Power-on Setting上方有 3 個 LED 燈,分別由不同的 GPIO 控制。最左邊,編號 LED03 的 LED 燈是由 GPIO B8 這根 pin 控制。今天示範如何用程式控制 GPIO B8 讓 LED 燈閃爍。
這是 LED 燈閃爍的程式,在看程式之前,我先為各位說明,在 Linux kernel 中,每一根 GPIO pin 都有編號。每一個 GPIO Group 占用 32個編號,編號為 0 到 31,分配給 GPIO Port A 這個 group,編號 32 到 63 分配給 GPIO Port B,以此類推。
LED03 這個 LED 燈是由 GPIO B8 這根 pin 控制,GPIO B8 在 Linux 中的編號是 40。
回到程式中,我們看到這個程式是透過 system function 執行系統命令,透過 Linux kernel 的 sysfs 控制 GPIO。
第 23 行 system("echo40 /sys/class/gpio/export"); 是將 GPIO
B8 設定成可以用sysfs 控制。
第 24 行 system("echo out /sys/class/gpio/gpio40/direction"); 是將 GPIO B8 設定為 output。
接下來在 while loop 中,透過 system("echo 1/sys/class/gpio/gpio40/value"); 讓 GPIO B8 輸出 high;再透過 system("echo 0 /sys/class/gpio/gpio40/value"); 讓 GPIO B8 輸出 low,中間延遲 1 秒鐘,就可以做到 LED 燈閃爍的功能。
這個程式,main.c,儲存後,進行 compile
輸入 arm-linux-gcc main.c -o gpio_toggle
(輸入 ls)
產生一個執行檔 gpio_toggle
將 gpio_toggle 拷貝到 root file system 目錄中,
(輸入 sudo cp gpio_toggle ../rootfs)
然後重新 compile Linux Kernel
透過 NuWriter 將 Linux kernel 下載到NuMaker NUC980 IIoT 板子上執行
Linux Kernel 開機完成後,輸入 ./gpio_toggle,執行閃爍 LED 的程式。
此時可以看到 NuMaker NUC980 IIoT 板子上的 LED 正在閃爍。
-
更多產品資訊,請至新唐科技網站 https://bit.ly/3hVdcmC
購買管道:https://direct.nuvoton.com/tw/numaker-nuc980-iiot
聯絡我們: SalesSupport@nuvoton.com

Watch time - 4:59
Secure Smart Metering Communication Reference Design
Hi everybody, today we are going to introduce a reference design of Smart-Metering communication card based on NuMicro M2351 Series microcontroller. You can find useful security features based on the Arm Cortex-M23 CPU core with Nuvoton’s in-house technology integration.
The auto-metering is an infrastructure for automatic, remotely, wire or wireless meter data reading. It’s highly possible to be intervened if there is no security mechanism. That is a very typical IoT security issue in the IoT era.
In many countries, there are a lot of Auto-Metering Infrastructure (AMI) projects being undertaken by main electricity power companies worldwide. Most projects start from upgrading the communication modem cards as the first step rather than retiring the meters. The modem card can play as a gateway to monitor the incorrect device operation and data transmission security. Issues of modem card security are covering:
First, a limited performance due to crypto computation efficiency
Second, speed limitation due to interface choice
The third, cost burden due to extra hardware modules for different communication protocols
Nuvoton’s reference design of Secure Smart Meter Communication is an end-to-end security solution for AMI. With the collaboration with SPI-Korea, the solution incorporates a lot of advantages such as TrustZone security for firmware, a range of interfaces for device communication, secure over-the-air firmware update, and remote management. With the complete hardware specification of M2351, a security software company, SPI-Korea, can easily implement their secure AMI solution for modem card which connects meters and cloud servers. M2351 also contributes the crypto acceleration during the cryptographic computing in order to save CPU time for different communication protocol modules by its powerful hardware functionalities during message transmission outside of a microcontroller unit.
SPI-Korea has developed a range of Armv8-M TrustZone based technologies. Her expertise covers Boot Manager, Key Manager, and Device Manager, which is very useful for microcontroller security and certainly shows the stability of a microcontroller device. Also, they are certified by Korea Electricity Company. We hope this successful experience can be further adopted in other areas worldwide because it’s a secure, accurate and environmentally safe solution for AMI.
This slide is a picture for SPI-Korea AMI modem card design. NuMicro Family microcontrollers can be utilized for designs of auto-metering infrastructure devices. We start from AMI modem card and we are confident to support meters of any next-generation of AMI. We now integrate M23-based microcontroller with M4-based or Arm9-based microcontroller as a proposal for next-generation modem card of Korea AMI and we hope to provide high-performing cost-effective solution for all AMI devices in the future.
-
For more information, please visit Nuvoton Technology Website: https://bit.ly/3hVdcmC
contact us: SalesSupport@nuvoton.com