NuMaker-IoT-M2354
|
Prebuilt APP Demo |
||
|
NuMaker-IoT-M2354 setup |
||
| 1. | Hardware Setup | |
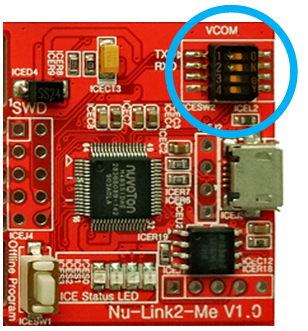
| (1) Open the virtual COM ( VCOM ) function by changing Nu-Link2-Me VCOM Switch No. 1 and 2 to ON. | ||
|
|
||
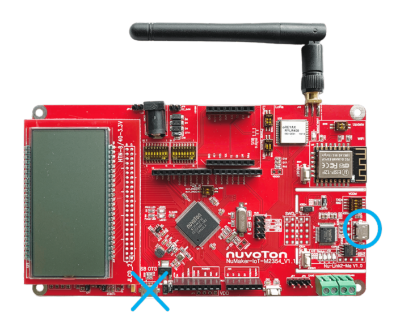
| (2) Connect the ICE USB connector to the PC USB port through USB cable. | ||
|
|
||
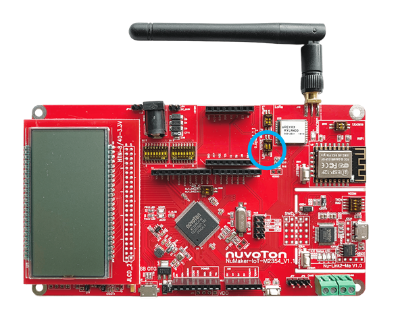
| (3) Turn on the Wi-Fi power by changing WiFi Switch NO. 1 to ON. | ||
 |
||
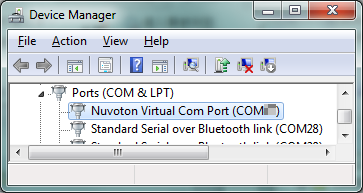
| (4) Find the “Nu-Link2 Virtual COM Port” on the Device Manger. | ||
|
|
||
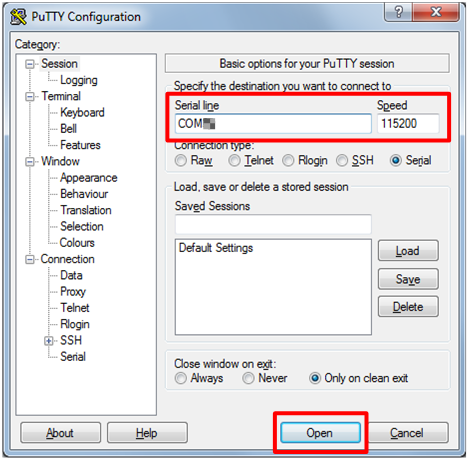
| (5) Open a serial port terminal, PuTTY, for example, to print out debug message. Set the speed to 115200. The below figure presents the PuTTY session setting. | ||
 |
||
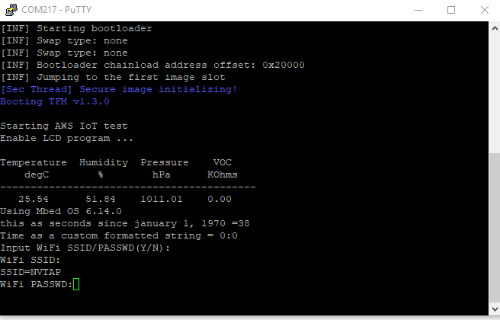
| 2. | After Open PuTTY, the terminal shows “Input WiFi SSID/PASSWD(Y/N))”. Enter Y/y then input your Wi-Fi SSID and Password. The SSID and Password will be stored as the default setting. | |
 |
||
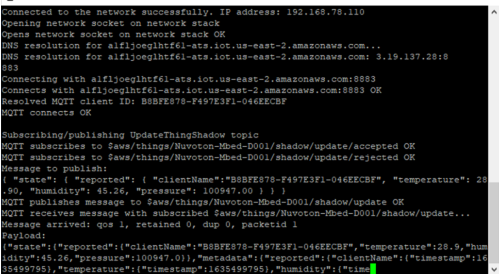
| 3. | After connecting to the Wi-Fi successfully, NuMaker-IoT-M2354 starts getting environmental data from BME680 and displays the data on the LCD panel. The data is also sent to the AWS cloud through MQTT. | |
 |
||
|
APP setup Android App is used here to demonstrate the steps, which also apply to iOS. |
||
| 1. | Search “CloudAWS” in the google play and install it. | |
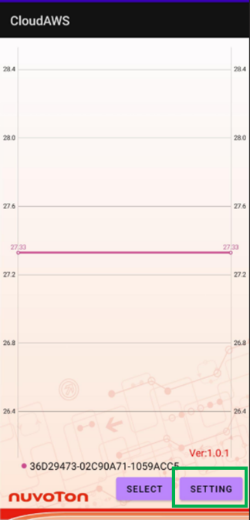
| 2. | Open CloudAWS and enter the settings screen. | |
 |
||
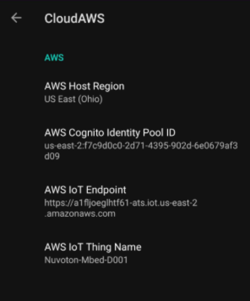
| 3. | Complete the setting of AWS(*) as follows: | |
| AWS Host Region: US East(Ohio) for Android/ USEast2 for iOS | ||
| AWS Cognito Identity Pool ID: us-east-2:f7c9d0c0-2d71-4395-902d-6e0679af3d09 | ||
| AWS IoT Endpoint: a1fljoeglhtf61-ats.iot.us-east-2.amazonaws.com | ||
| AWS IoT Thing Name: Nuvoton-Mbed-D001 | ||
| (*) Please refer the below links for detailed information: | ||
| https://docs.aws.amazon.com/general/latest/gr/cognito_identity.html | ||
| https://docs.aws.amazon.com/iot/latest/developerguide/connect-to-iot.html | ||
 |
||
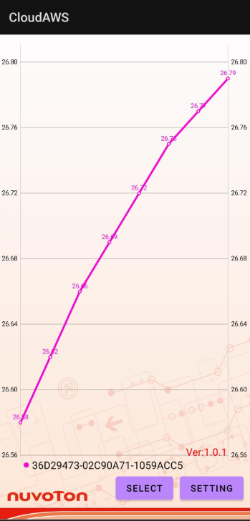
| 4. | Go back to the main screen. The temperature data sensed from NuMaker-IoT-2354 is displayed on the App simultaneously. | |
 |
||
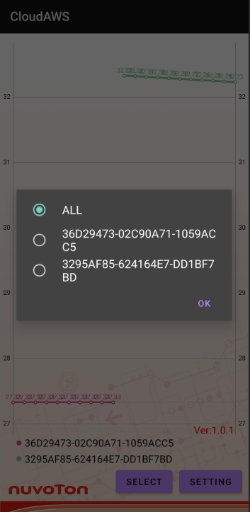
| 5. | The App shows all device’s data in default. you could use SELECT to change setting. | |
 |
||
|
Burn Firmware |
|||||
|
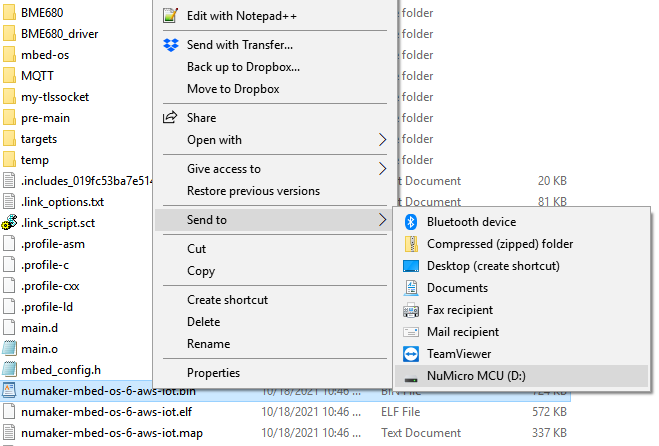
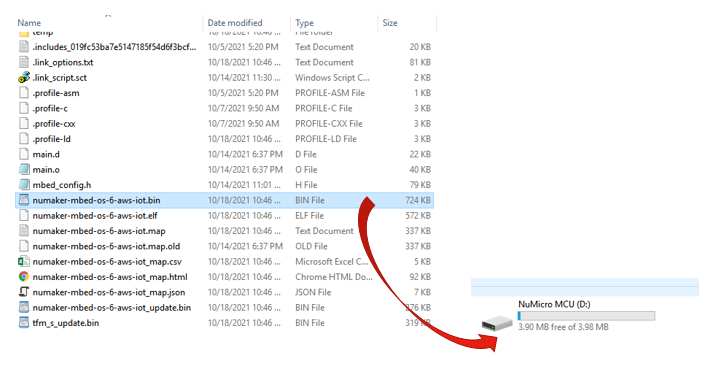
For easy verification of AWS IoT connection on NuMaker platforms, Nuvoton provides prebuilt bin file with AWS certificate and key and you can drag and drop this bin file into your NuMaker board on hand. The prebuilt image can be downloaded from the link below: https://github.com/OpenNuvoton/M2354BSP/tree/master/SampleCode/NuMakerIoT/mbedOS6_AWS_IoT A simple firmware burning method is that you can drag and drop the binary image file to NuMicro MCU virtual disk to burn firmware. |
|||||
| 1. | Connect the ICE USB connector to the PC USB port through USB cable. | ||||
| 2. | The window manager will show a ‘NuMicro MCU’ and you could use this virtual disk to burn firmware. | ||||
 |
|||||
| 3. | Drag and drop the prebuilt binary image file into the NuMicro MCU virtual disk to burn firmware as shown below. | ||||
 |
|||||
|
Build from Source |
|||||
| 1. | Download and install the Mbed Studio: https://os.mbed.com/studio/ | ||||
| 2. | System requirements. | ||||
| - | Linux (Ubuntu 18.04) (64 bit) | ||||
| - | Mac 10.11 or higher (64 bit) | ||||
| - | Windows 10 (64 bit) | ||||
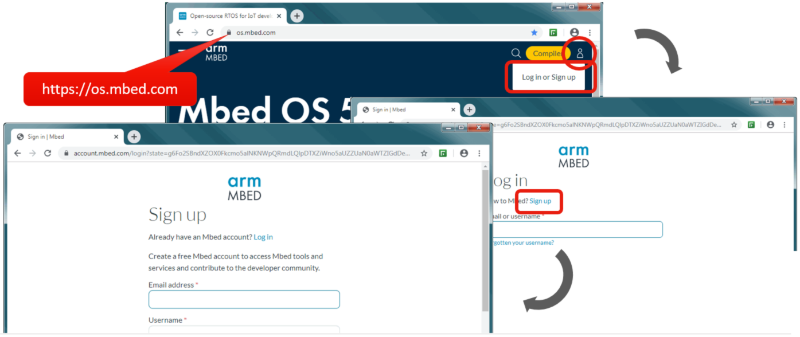
| 3. | Create or sing up the Mbed Account | ||||
 |
|||||
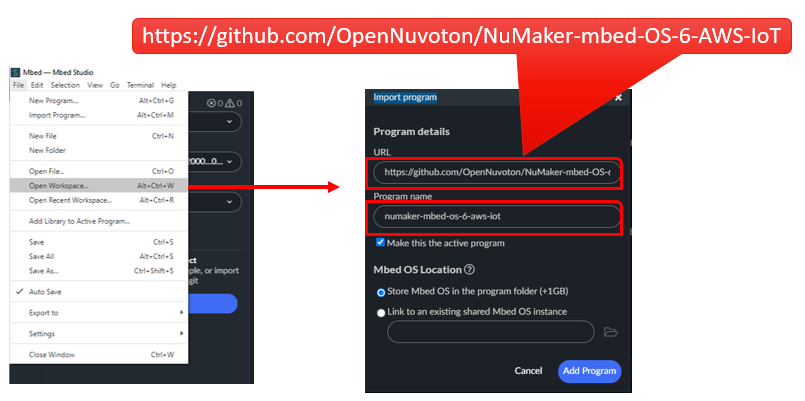
| 4. | Open Mbed studio and select “import program” from URL: https://github.com/OpenNuvoton/NuMaker-mbed-OS-6-AWS-IoT | ||||
 |
|||||
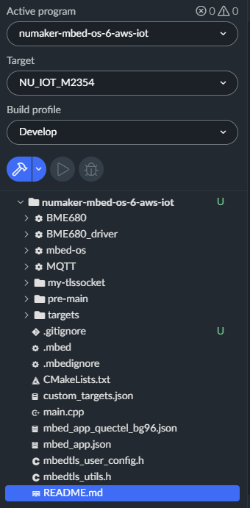
| 5. | Select the target as NU_IOT_M2354 and build profile as Develop. Click the blue icon to build program. | ||||
 |
|||||
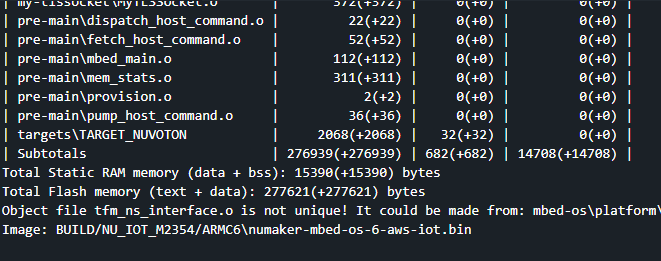
| 6. | After building process is finished, the bin file will be created in the BUILD folder. | ||||
|
Note: To run the example and connect to the cloud, you need to register one AWS account to access and manage AWS IoT Service for your device to connect with. Please refer the README on https://github.com/OpenNuvoton/NuMaker-mbed-OS-6-AWS-IoT |
|||||
|
*Ordering Number : NK-IOTM2354 |
|||||
