NuMaker-CM1003DL8
| 1. | Install the preferred toolchain. Please make sure at least one of the toolchains has been installed. | ||||
| - | KEIL PK51 Professional Developer’s Kit | ||||
| - | IAR EMBEDDED WORKBENCH FOR 8051 | ||||
| - | NuEclipse_Windows (For NuMicro 8051) | ||||
| - | NuEclipse_Linux (For NuMicro 8051) |
||||
| 2. | Download and install the latest Nuvoton Nu-Link Driver. | ||||
| - | Download and install Nu-Link_Keil_Driver when using Keil MDK. | ||||
| - | Download and install Nu-Link_IAR_Driver when using IAR EWARM. | ||||
| - | Skip this step when using NuEclipse. | ||||
| 3. | Download and unzip the Board Support Package (BSP). | ||||
| 4. | Hardware Setup | ||||
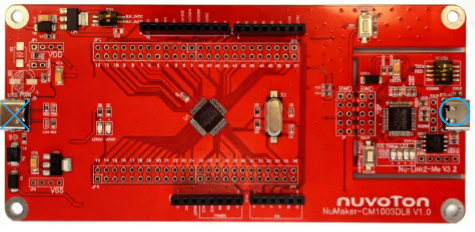
| (1) Open the virtual COM ( VCOM ) function by changing Nu-Link2-Me VCOM Switch No. 1 and 2 to ON. | |||||
|
|
|||||
| (2) Connect the ICE USB connector to the PC USB port through USB cable. | |||||
|
|
|||||
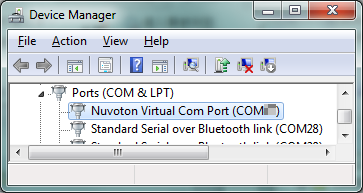
| (3) Find the “Nuvoton Virtual COM Port” at Device Manger. | |||||
|
|
|||||
| 5. | Use the “Template” project as an example. The project can be found under the BSP folders. | ||||
| - | CM1003_Series_BSP_CMSIS_V3.XX.XXX | ||||
| - | SampleCode | ||||
| - | Template | ||||
| - SDCC | |||||
| - IAR | |||||
| - KEIL | |||||
| 6. | Open and execute the project under the toolchain. For detail setting, please refer to the NuMaker-CM1003DL8 User Manual. |
||||
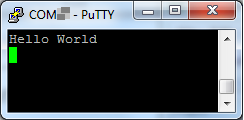
| 7. | User can see the result in the ternimal window on PC. | ||||
|
Resources User Manual | Microcontrollers | Software Development Tool | Driver (BSP) | Programmer | Nuvoton Official Forum | Nuvoton eStore *Ordering Number : NK-CM1003DL8 |
|||||