Search
Search Results
SearchPlatform Resource ,
find 22 items
- Sort by
- Most recent
- Popularity

애플리케이션
웨비나
Watch time - 16:57
In this webinar, we will share our viewpoint on the trend of embedded GUI and the user expectation for the modern graphical HMI platform and the ecosystem on the embedded applications.
Furthermore, the attendees will get a good overview of the Nuvoton NuMicro HMI platform provides flexible solutions to address them,
and the development of embedded GUI for HMI applications becomes very easy by leveraging the complete NuMicro HMI platform.
#en #Webinar #General #Application
-
For more information, please visit Nuvoton Technology Website: https://bit.ly/3hVdcmC
buy now: https://direct.nuvoton.com/
contact us: SalesSupport@nuvoton.com

제품
애플리케이션
공부하다
Watch time - 5:20
Hi everyone, I'm Aaron. The FAE of Nuvoton technology.
Today, I'm glad to show you the Nuvoton secure development board, NuMaker-IoT-M2354. The NuMaker-IoT-M2354 is an IoT evaluation board powered by the NuMicro® M2354 series. Before the introduction of NuMaker-IoT-M2354, I will take you to a quick understanding of NuMicro M2354. The M2354 is the latest NuMicro IoT series product which is based on Arm® Cortex®-M23 CPU core technology. The TrustZone® technology based on Armv8-M architecture is a CPU system-wide approach to microcontroller security. The M2354 series carry 1 Mbytes embedded Flash memory and 256 Kbytes SRAM. It's essential for IoT devices with real-time OS requirements. And you can focus on software development without warring about the flash and SRAM resource.
The M2354 series is equipped with plenty of peripherals. In addition to providing UART I2C SPI Timer, it also supports the Quad SPI, USB FS OTG, and CAN BUS. Furthermore, to satisfy the IoT device's display development, the M2354 series built-in 8 COM x 40 SEG LCD controller drives up to 320 dots to meet various smart home and IoT appliances.
In addition to providing many peripherals, the critical feature of M2354 is supporting many security functions. The secure boot ensures the legality and integrity of the running firmware. The hardware crypto with RSA/ECC/AES/SHA accelerators can help the device connect to the cloud fast and safely. Moreover, the M2354 is equipped with Key Store, which could be used with crypto accelerators to enhance the chip security level.
To comply with Arm PSA CertifiedTM Level 3, the M2354 has implemented some countermeasures to protect against non-invasive attacks like side-channel attacks or fault injection attacks.
The NuMaker-IoT-M2354 equips a Bosch environmental sensor, BME680, which contains temperature, humidity, barometric pressure, and VOC gas sensing capabilities. After getting data from the sensor, users can send data to the cloud, such as Pelion or AWS, by Mbed OS. Because M2354 supports hardware crypto, the data can be sent more efficiently and safely. The data could be shown on the LCD panel by the LCD library provided in the M2354 BSP.
The NuMaker-IoT-M2354 contains a Wi-Fi module and LoRa module for wireless applications. Depending on the data throughput and power consumption, you can choose one of them for your IoT applications. In the LoRa network, each node is not connected but must be connected to the gateway before being linked back to the central host, or data can be transmitted to another node through the central host. For example, if choosing the LoRa module for the cloud development, you could use NUC980 LoRa Gateway for your gateway platform.
The NuMaker-IoT-M2354 supports the radio frequency band of the LoRa module on 915MHz and 433MHz, depending on the customer's requirement.
In addition to providing the rich peripheral, the NuMaker-IoT-M2354 also equips the Arduino UNO connector and mikroBUS™ connector for flexible applications.
Suppose you want to develop other wireless connecting features like 4G-LTE or NB-IoT. In that case, the Nuvoton also provides a UNO-to-PCI adapter board to supports Quectel EC21 4G/LTE and Quectel BG96 NB-IoT modules.
The NuMaker-IoT-M2354 also provides multiple power supplies by external power connectors and an ammeter connector that can instantly measure power consumption. In addition, the Nu-link2-Me on the board is a debugger and programmer supporting development on Keil, IAR, GCC, and Mbed IDE.
#en #Learning #Basic #Application #Product
-
Online Purchase Development Tools:
● M2354 Series
https://www.nuvoton.com/products/microcontrollers/arm-cortex-m23-mcus/m2354-series/index.html
● NuMaker-LoRa-NUC980
https://www.nuvoton.com/products/iot-solution/lora-platform/
● NuMaker-M2354
https://direct.nuvoton.com/tw/numaker-m2354
● Quectel-BG96A
https://direct.nuvoton.com/en/quectel-bg96a
● Quectel-EC21A
https://direct.nuvoton.com/en/quectel-ec21a
-
For more information, please visit Nuvoton Technology Website: https://bit.ly/3hVdcmC
buy now: https://direct.nuvoton.com/
contact us: SalesSupport@nuvoton.com

제품
도구
공부하다
Watch time - 8:24
The video introduces Nuvoton's MPU N9H30's development set-up for Linux and Non-OS, taking NuMaker-emWin-RDK-N9H30 for example. Starting from the EVB introduction to BSP and related software downloads.
-
User manuals and related resource can be downloaded
https://www.nuvoton.com/products/gui-solution/gui-reference-design/numaker-emwin-rdk-n9h30/
First, we introduce how to program Linux OS to the N9H30 evaluation board
Find the N9H30 evaluation board resource that we used on Nuvoton’s Github and download the VMware Image
https://github.com/OpenNuvoton/MPU-Family
VMware application can be downloaded from the VMware website
https://www.vmware.com/tw/products/workstation-player/workstation-player-evaluation.html
First, open the VMware
Find the ubuntu_NUC970_980_Linux folder we downloaded
Choose Ubuntu 64-bit_nuvoton.vmx
Choose Play virtual machine
The password is “user”
It will take a while to open this application for the first time
Open the terminal when the system is ready
Enter NUC970_Buildroot-master folder
After entering the folder, we need to update the Buildroot tool
Enter the command as shown below
“git reset –hard”
“git pull”
After updating, enter the dl folder
Remove the original Linux kernel and u-boot
Enter the command as shown below
“sudo rm -rf linux-master.tar.gz uboot-master.tar.gz”
After entering, enter the password “user”
Leave the dl folder and enter the Buildroot folder
Enter the “make clean” command
You don’t need to do these steps unless updating Buildroot tools
Now, we set up the evaluation board configuration
Enter configs folder to search evaluation board name
Back to buildroot after searching
Enter “make nuvoton_n9h30_emwin_defconfig” to generate configuration file
After finishing these step, enter “make” to compile
It will take about three hours to compile
After compiling, copy the two files below to windows
“/NUC970_Buildroot-master/output/images/uImage”
“/NUC970_Buildroot-master/output/build/uboot-master/u-boot.bin”
Create text file ”env-nor.txt”
The content is shown below:
baudrate=115200
bootdelay=1
stderr=serial
stdin=serial
stdout=serial
setspi=sf probe 0 50000000
loadkernel=sf read 0x7fc0 0x200000 0x600000
bootcmd=run setspi;run loadkernel;bootm 0x7fc0
bootargs=noinitrd root=/dev/mtdblock2 rw rootfstype=jffs2 console=ttyS0 rdinit=/sbin/init mem=32M mtdparts=m25p80:0x200000@0x0(u-boot),0x600000@0x200000(kernel),-(user) ignore_loglevel
Then, we need to install NuWriter and related file
The NuWriter is a programming tool provided by Nuvoton. The NuWriter application and firmware code are open-sourced, and users can add new features or develop new user interfaces per user’s application
NuWriter: https://github.com/OpenNuvoton/MPU-Family
Open “NUC970_NuWriter-master”
Enter Driver folder and install “WinUSB4NuVCOM.exe”
Enter /Nuwriter/Release and execute NuWriter
Choose IC number based on the evaluation board
We need to program Image to SPI Flash, so we choose SPI
Here we need to turn the all Power-On Setting to ON
Push Reset button
Return to NuWriter to check the green light and the connection
If it is not connecting, click Re-Connect to reconnect
After confirm the connection, start to program Image
Program the three files to particular address
u-boot.bin program to 0xe00000
env.nor.txt program to 0x80000
uImage program to 0x200000
After programming, turn the Power-On Setting to off
Push the Reset button
Evaluation board can start to boot from SPI-NOR
After booting, we need to find the rcS demo application under/etc/init.d
Enter “chmod 777 rcS” to modify the application
Now, you can see the application on the evaluation board panel
Here, we finish compiling and programming
The next topic is how to compile and program Non-OS code
First, download MDK-Arm from the link below
https://www.keil.com/download/product/
Download the Non-OS BSP provided by Nuvoton
https://github.com/OpenNuvoton/MPU-Family
The BSP includes Keil environment set up user manual
Use Keil need to purchase the related license
After downloading, Open Keil uVision
Click the File on the upper left and choose Open
Go to the BSP that we downloaded choose BSP, SampleCode, emWin_SimpleDemo, KEIL and emWin_SimpleDemo.uvproj
Click Option for Target
Click Device and choose NuMicro ARM9 Database and N9H_series
After setting up, click Rebuild, and it will generate a sample code application which is a binary file
Open the NuWriter and connect it to the evaluation board
Choose SPI and search the application we built
\N9H30_emWin_Non-OS_BSP_v1.04.000\N9H30_emWin_Non-OS_BSP_v1.04.000\BSP\SampleCode\emWin_SimpleDemo\KEIL\obj\emWin_SimpleDemo_FW070TFT_24BPP.bin
Follow the setting and program the file to 0x0
After programming, turn the Power-On Setting to boot from SPI
You can see the demo application on the evaluation
#Basic #Product #Tool #Learning #en
-
For more information, please visit Nuvoton Technology Website: https://bit.ly/3hVdcmC
buy now: https://direct.nuvoton.com/
contact us: SalesSupport@nuvoton.com

Watch time - 5:45
The video introduces Nuvoton's emWin graphic library for HMI applications, it also includes the breif HMI introduction, emWin resources.
-
For more information, please visit Nuvoton Technology Website: https://bit.ly/3hVdcmC
buy now: https://direct.nuvoton.com/
contact us: SalesSupport@nuvoton.com

훈련
도구
공부하다
Watch time - 5:9
Hello everyone, I am Chris, the field application engineer from Nuvoton Technology. Today, I will introduce the application and principle of programmable seriel I/O aka PSIO on M251/M252.
The programmable serial I/O of NuMicro M251/M252 series can generate arbitrary waveforms and combine them to achieve data transmission and reception of specific serial communication protocols.
Of course, standard serial communication can also be achieved, such as UART SPI I2C
Usually, it is common to use Timer+GPIO to achieve these specific communication protocols, but it is more complicated and requires frequent CPU intervention.
When we use PSIO, this not only simplifies the complexity of the operation but also reduces the burden on the CPU. The saved CPU performance could be distributed in other places.
Since all hardware operations do not require software intervention, the timing control is more precise.
The principle of PSIO is to use a slot controller to control the pin input and output or determine the state, and it can also control the duration of these states.
Each slot controller has eight slots, which can be used as eight settings, and the registers corresponding to each slot can access the data that needs to be input and output, and can also set the time for the current pin to maintain this state.
Each slot can reach a checkpoint, usually 1 to 1, 2 to 2, 3 to 3, and so on. Each checkpoint can set the pin status of the corresponding slot within the corresponding time.
Next, let’s take a look at a simple output-only example
In the initial stage, we first set the state of the pin to be high before SLOT has started, so the output is high
Then when the Slot controller receives the start signal, SLOT0 is set to output low level according to the setting of CP0 and waits for the time of SLOT0 to expire.
Then SLOT1 is set to output low level according to the setting of CP1 and waits for the time of SLOT1 to expire.
And so on, followed by SLOT2 output low level
SLOT3 low level
SLOT4 high level
SLOT5 high level
After SLOT5, since SLOT6 is not set, the waveform of the protocol can be completed with only six slots
Between the time of the next data transmission, we set the interval low, so the output is low at this time
Users can complete different protocols according to these simple operations.
In the related resources section, we have provided two PSIO application notes. There are two protocol examples with more detailed operations and descriptions. If you want to know more details about PSIO, please download it from the URL in the video.
Several sample codes of different protocols are also provided in BSP.
That’s all for this tutorial. Thank you for watching it. Welcome to subscribe to our channel. If you want to know more information, please contact us.
#Tool #Training #Learning #Intermediate #en
-
For more information, please visit Nuvoton Technology Website: https://bit.ly/3hVdcmC
Buy now: https://direct.nuvoton.com/numaker-m251sd
Contact us: SalesSupport@nuvoton.com

훈련
도구
공부하다
Watch time - 4:26
Hello everyone, I am Chris, the field application engineer from Nuvoton Technology. Today I will introduce the power modes of the M251/M252 series microcontroller.
The M251/M252 series has multiple power modes. The differentiation is based on power consumption, wake-up time, the operable CPU, and peripherals.
In normal mode, the CPU is running normally. In Idle mode, only the CPU clock is disabled while other peripherals work as usual.
Normal mode and idle mode can be divided into high-efficiency high-speed PL0 mode and low-power low-speed PL3 mode according to CPU operating speed.
We should note that in the low-speed PL3 mode, only the clock source of the CPU and peripherals is 32.768 or 38.4 kHz can run.
In power-down mode, there are three types according to power consumption.
The first is NPD (Normal Power Down Mode). The CPU and high-speed peripherals stop running, and only the low-speed peripherals can work normally.
The second is FWPD (Fast Wake Up Power Down Mode), which is the fastest wake-up of the three power-down modes but consumes more power.
The third is DPD (Deep Power Down Mode), which consumes the lowest power among the three power-down modes, but the data in the RAM cannot be retained, and the wake-up speed is the slowest. Specific peripherals or pins can only activate the wake-up.
For power consumption and wake-up time, we list the corresponding data. Users can choose the most suitable power mode according to the required power consumption and wake-up time.
We need to note that FWPD mode will consume more power in the power-down mode because this mode wakes up the fastest.
The DPD mode is the least power consumption, but the longest wake-up time.,
Also, normal mode is a normal working mode, so there is no need to wake up.
The time unit of the idle mode is different from the power-down mode, which is five cycles. The length of a cycle is determined according to the operating frequency used by the system.
In the related resources section, we provide application notes for power management, which have more detailed operations and descriptions. If you want to know more, please download it from the URL in the video.
There are also various power mode entry and wake-up methods in the BSP package; you can also refer to and use it.
That’s all for the power modes introduction. Thank you for watching it. Please subscribe to our channel for more video resources. If you want to know more information, please contact us.
#Tool #Training #Learning #Intermediate #en
-
For more information, please visit Nuvoton Technology Website: https://bit.ly/3hVdcmC
Buy now: https://direct.nuvoton.com/numaker-m251sd
Contact us: SalesSupport@nuvoton.com
훈련
도구
공부하다
Watch time - 8:37
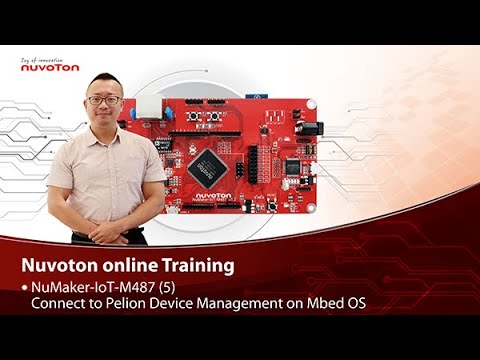
NuMaker-IoT-M487 (5)
Connect to Pelion Device Management on Mbed OS
Hello everyone, I am Morgan, the principal engineer of Nuvoton Technology. Today, I will show you how to connect to Pelion Device Management with Mbed OS on NuMaker-IoT-M487 development board.
Because the demonstration needs to store certificate, a MicroSD card is required.
Open Chrome browser, enter the URL https://cloud.mbed.com/quick-start
If you didn’t use Pelion Device Management before, you need to activate your Mbed account to access Pelion. Click the “Activate your free access”. Then log in your Mbed account.
Click “Activate Pelion Device Management account“…
Select the “Start the Connect Tutorial”
Then scroll down to select NuMaker-IoT-M487 (WiFi)
--After selected, scroll down and click “Get started”--
If you have completed previous tutorial, the NuMaker-IoT-M487 board has been selected in your Mbed account.
Please click the “2.2” to import the Pelion Connect Tutorial into your Online Compiler.
It shows the import dialog box, please click Import.
Wait for a moment while importing the sample code.
Click “mbed-os-example-pelion” project name,
Then click “Pelion Device Management” on menu bar, select “Manage Connect Certificates” in pull-down menu to create a Pelion certificate.
You need to provide API key. You can create a new one here.
Log in your mbed account.
Accept
Then click New API key
Assign an API Key name
Click Close
After created an API key, back to online compiler,
Then click Manage Connect Certificate again.
API Key automatically filled here.
Click OK.
Click “Create”, then assign a name for the certificate.
Click OK.
Click the certificate just created to select it, then click OK.
The online compiler will automatically update source code with the selected certificate.
Click “Pelion Device Management” on menu bar again, select “Apply Update Certificate”. An “Update Certificates” dialog box appears. Create it.
Click Download Private Key and save it.
Please make sure that NuMaker-IoT-M487 board already selected in the upper right corner. If not, please refer Nuvoton IoT Tutorial series “Get Started with Mbed OS” which has a detailed description of how to add a board.
In order to use Wi-Fi, you have to configure SSID and password to match your Wi-Fi access point setting.
In the mbed_app.json file, the default Wi-Fi security set to WPA and WPA2 in “nsapi.default-wifi-security” field. Please modify the field “nsapi.default-wifi-ssid” to your Wi-Fi SSID
Then modify “nsapi.default-wifi-password” to your Wi-Fi password.
Click on “Compile” to build it. Have to wait for a while.
Then you can see the last message is “Success!” at the bottom of this page.
The browser will download the binary firmware file directly after a successful compiling. It will be saved in a default download folder or the folder based on your browser setting. In Chrome, you can click download file and select “Show in folder”.
Then we connect the NuMaker-IoT-M487 USB port to your computer and make sure the onboard LED lights up.
Let’s back to the download folder where you can see the binary firmware file (mbed-os-example-pelion.NUMAKER_IOT_M487.bin). Drag and drop the file to NuMicro MCU drive.
You will see the copying progress dialog box.
Please find the virtual COM port assigned for NuMaker-IoT-M487 in Device Manager. In the tutorial, the “Nu-Link Virtual Com Port” is COMx.
Then use your terminal tool. Here we use Putty. Open the COMx port with 115200 baud rate, 8 bits, 1 stop bit, none parity, and no flow control settings.
Then “Open” it.
Press Reset button on board to run again.
You can see the connection messages printed on terminal. It shows the board’s IP address obtained from the Wi-Fi access point, and the Endpoint Name.
Then you can see the device resource in Pelion Device Management Portal.
Log in Pelion Portal with the same Mbed account.
Click Device directory. Find the device ID which should be registered state.
Click the Device ID, it shows the Device details.
Click RESOURCES, find the resource 3200/0/5501. Click the resource.
Now, you can press keys in terminal to increase the counter. Or the counter automatically increase 1 by one second. The demo code also updates the counter to Pelion. You will see the value change in the graph.
That’s all for this tutorial. Thank you for watching. Welcome to subscribe to our channel. If you want to know more information, please contact us at SalesSupport@nuvoton.com
-
For more information, please visit Nuvoton Technology Website: https://bit.ly/3hVdcmC
Buy now: https://direct.nuvoton.com/tw/numaker-iot-m487
Contact us: SalesSupport@nuvoton.com
#tool #training #learning #intermediate #en

애플리케이션
공부하다
Watch time - 3:48
The rich features of NuMaker IoT platforms have been certified by several RTOS and clouds. In this video, we introduce the NuMaker-IoT-M487 development board, supported OS and clouds, and an IoT demonstration.
#Application #Learning #Basic #en
-
For more information, please visit Nuvoton Technology Website: https://bit.ly/3hVdcmC
buy now: https://direct.nuvoton.com/tw/
contact us: SalesSupport@nuvoton.com

제품
공부하다
Watch time - 26:19
The ML51 is a Flash embedded 1T 8051-based microcontroller. The instruction set of the ML51 is fully compatible with the standard 80C51 with performance enhanced and low power consumption.
The ML51 runs up to 24 MHz at a wide voltage range from 1.8V to 5.5V, and contains up to 64/32/16/8 Kbytes Flash called APROM for programming code. The ML51 Flash supports In-Application-Programming (IAP) function, which enables on-chip firmware updates.
The ML51 includes an additional configurable up to 4/3/2/1 Kbytes Flash area called LDROM, in which the Boot Code normally resides for carrying out the In-System-Programming (ISP).
-
For more information, please visit Nuvoton Technology Website: https://bit.ly/3hVdcmC
buy now: https://direct.nuvoton.com/tw/ml51-series/
contact us: SalesSupport@nuvoton.com
#Product #Learning #Basic #en
0:00 簡介
0:20 Agenda
0:45 NuMicro Product Portfolio
1:28 2019 Brand New MCU Platform
2:06 ML51/ML54/ML56 Series Portfolio
3:29 ML51 Series Low
4:50 NuMicro Naming Rule
6:06 NuMicro® ML51 Features
8:19 4 Different Power Modes
10:44 Low Power Mode Features • Wake up resource: WKT, ACMP, GPIO
12:37 Low Power VS Battery Life
13:28 ADC
15:00 Comparison of 8-bit Products Feature
17:13 Fire Fighting System
21:30 Battery Management System (BMS)
22:30 Gaming Phone
23:36 Development Board
24:13 Development Environment

Watch time - 9:40
以新唐 NuMaker NUC980 IIoT 為平台,使用 Linux 進行開發,學習開發各式功能,觀看本片,您將學會在 NuMaker NUC980 IIoT上使用 Ethernet 連接到 AWS IoT 服務。
大家好我是新唐工程師 Miya,今天要為各位介紹,如何使用 NuMaker NUC980 IIoT 開發平台連接 Amazon 的物聯網,以下簡稱 AWS
連結網址 https://aws.amazon.com/ ,登入 AWS 帳號
點擊右上角的 “Sign In to the Console”,進入帳號登入頁面
輸入您的帳號密碼,點擊 “Sign In” 進行登入
登入之後,進到 “AWS 管理控制台” 頁面
在搜尋欄位,輸入 “IoT Core”,會出現 IoT Core 連結,點擊進入
在左邊的欄位選擇 “入門” 頁面
在 “設定裝置” 點擊 “開始使用” ,開始設置 IoT 裝置
選擇連接 AWS IoT連線方式。platform 請選擇 Linux, SDK 請選擇 Python。
點擊 “下一步” 進到下一個頁面。
接下來開始註冊一個 IoT Thing,有三個步驟。
首先命名 IoT Thing,接著按下一步。
這個連線套件不會用到,按取消之後跳到下一步。
接下來2個頁面直接按 “完成” “完成”。
系統會跳回到管理頁面。
點擊左側選單 “管理” “實物”。可以看到剛剛建立的 my-IoT 出現在 IoT Thing 裡面了。
接下來要對這個新建立的 Thing 做一些設定,直接點擊新建立的 Thing-my-IoT,進入管理頁面。
在左側選單,選擇 “互動” 。
在互動頁面裡可以看到 Thing 的 HTTPS 連結。 複製此 HTTPS,用戶端應用程序需要知道這個連結,才能夠連接到這個 IoT Thing。
接下來下載安全憑證,請在頁面左側選單,點擊 “安全”,進入憑證頁面。
然後點擊 “建立憑證”。
憑證建立完成會產生三個檔案,分別是憑證、公鑰及私鑰。分別點擊 “下載”以下載這三個檔案,NuMaker NUC980 IIoT 開發平台用戶端進行 AWS IoT 連線的時候會用到。
下載完成之後,點擊 “啟用”,使這個安全憑證生效。
接著還需要下載 AWS IoT 的根憑證,點擊 “CA 下載” 連結,以開啟另一個瀏覽頁面。
點 CA Certificates for Service Authentication 連結,系統會跳到 AWS IoT root CA 的下載頁面。
請選擇第一個根憑證,RSA 2048 bit key,按滑鼠右鍵,另存連結,存到檔案 “AmazonRootCA1.pem”。
下載完成之後,回到剛剛的頁面。
接下來,點擊 “連接政策”,進行 policy 設定。
點擊 “建立新政策”以建立一個新的 policy。
先輸入 policy 名稱。
選擇 “進階模式”,直接編輯 policy 內容。
在Effect 敘述輸入 Allow,允許操作。
在 Action 敘述輸入 “I:*”,接受所有的 IoT 命令。
在 Resource 敘述輸入 “*”, 允許取用 resource。
按 “建立” 建立新的 Policy。
在左側選單,重新點擊 “管理”→ “實物”,選擇 my-IoT thing,回到 my-IoT 頁面。
再次點擊 “安全”,然後選擇剛才建立的憑證。
在憑證頁面左側的選單選擇 “政策”。目前 Policies 還是空的。
打開右上角的 “動作”下拉選單,選擇 “連接政策”。
在 Policy 列表裡面,會出現剛才新建立的 Policy。打勾選取,然後按 “連接 “,完成 policy 的附加。
這時候 Policies 頁面就會出現我們所選擇的 Policy 了。到這邊已經建立好了雲端的 IoT Thing。接下來,要在 NuMaker NUC980 IoT 板上建立用戶端 IoT 應用。
請連接網址 tls.mbed.org/download 以下載 mbedTLS library。
點擊連結 mbed TLS 2.16.3(Apache) 進行下載儲存。
接下來要將把下載的 mbedTLS library 複製到 NUC980 Linux 開發環境下;先解壓 mbedTLS library後,用 git 下載 AWS 的 SDK。
git clone https://github.com/aws/aws-iot-device-sdk-embedded-C
下載完成之後,先刪除他在 external lib 目錄下的 mbedTLS 目錄,這是個空目錄。
將先前下載解壓後的 mbedTLS 目錄移動到 external lib 目錄下就可以直接編譯 AWS SDK 的範例了。
進到 AWS SDK 的 samples 目錄下的 Linux 目錄下可以看到 5 個 範例。要使用的範例是最底下這個 subscribe_publish_sample。
進到這個範例的目錄下。
有三個檔案,需要作一些修改。
首先修改 makefile,將 compiler linker 由 gcc,改為 NUC980 Linux toolchain 的 compiler linker。
51. 往底下找到 CRYPTO_LIB_DIR,修改路徑,將 crypto 刪除,這樣 makefile 就完成修改了。
(~00:25)
52. 接著是 header file,修改MQTT HOST 連結路徑,先前我們在 IoT thing 的 “互動” 頁面所複製
的 HTTPS 連結,將它貼到這裡。(~00:46)
53. CLIENT ID 請任意取一個名稱,不要與其他用戶端名稱重複即可。(~00:55)
54. MY THING NAME 要用前面建立的 IoT Thing 的名稱: my-IoT。(~01:02)
55. 底下的 ROOT CA file name,IoT Certificate file name,以及 IoT private key filename。
56. 前面在建立 IoT Thing 安全憑證過程中,有下載了 Root CA 及 IoT 安全憑證幾個檔案,請將
檔案名稱填寫到這裡。
最後是修改 點 C,系統會將範例程式執行檔放到 root file system 的 usr/bin 目錄下,並將憑證檔案放到 usr/certs 目錄下。 這裡請將憑證指定目錄改為 相對路徑的 ../certs。
接著打 make 直接進行編譯。
編譯需要幾分鐘的時間,影片跳過了編譯部分。
接下來,將編譯好的應用程序複製到 rootfs 的 /usr/bin 目錄下。
然後將根憑證及 IoT 安全憑證檔案複製到 rootfs 的 /usr/certs 目錄下。這裡已經事先複製好了。完成後到 BSP Linux 目錄下,編譯 kernel。
將 kernel 上傳到 IoT 開發板上面執行。
下 ifconfig + udhcpc 指令連接網絡。
由於憑證有時效性問題,需要修改系統時間,以免因為憑證過期導致無法連接。
進到 usr/bin 目錄下,執行 AWS用戶端範例程序。
可以看到用戶端已經成功連接 AWS 雲端。這個範例會不斷地發佈並且接收訊息。
-
更多產品資訊,請至新唐科技網站 https://bit.ly/3hVdcmC
購買管道:https://direct.nuvoton.com/tw/numaker-nuc980-iiot
聯絡我們: SalesSupport@nuvoton.com